June 29, 2023
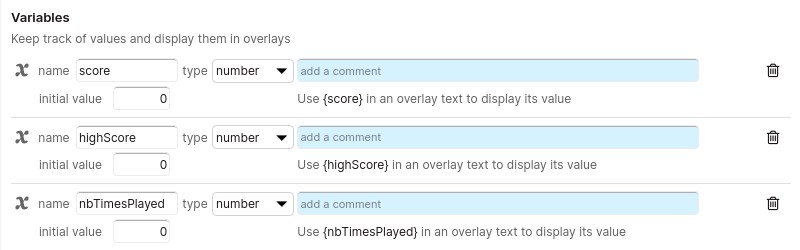
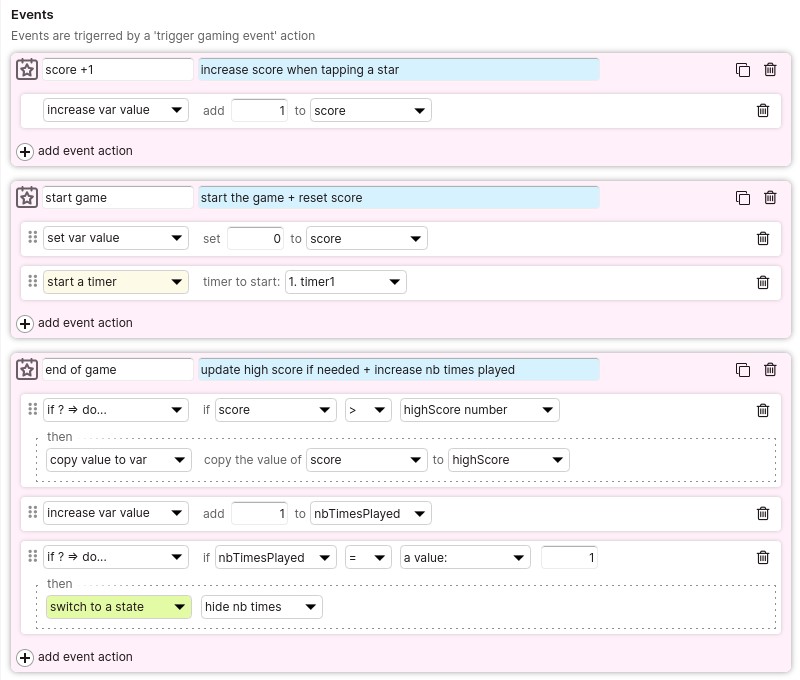
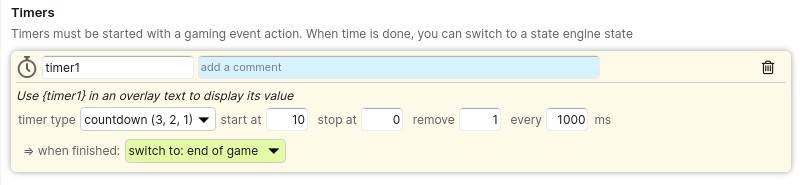
With the XR+ no-code gaming module, manage scoring, timers, variables, generate random values, and set conditions (if -> then).
The gaming module is the perfect tool to make web AR/ web VR mini games.

This module is not available on basic accounts, contact us for more details
June 28, 2023
To add a sound effect or a music to a scene, import an audio file to the library and add it to a scene.
You can use the scene timeline to delay the starting time of the audio
When leaving the scene, all audio items included in the scene are stopped.
Audio items have 2 modes: ambient and spatial
Ambient audio have a constant volume
Spatial audio volume depends of the distance between the user and the audio source. You can place a A spatial audio anywhere in the scene and choose its max distance, symbolised by the sphere rings.
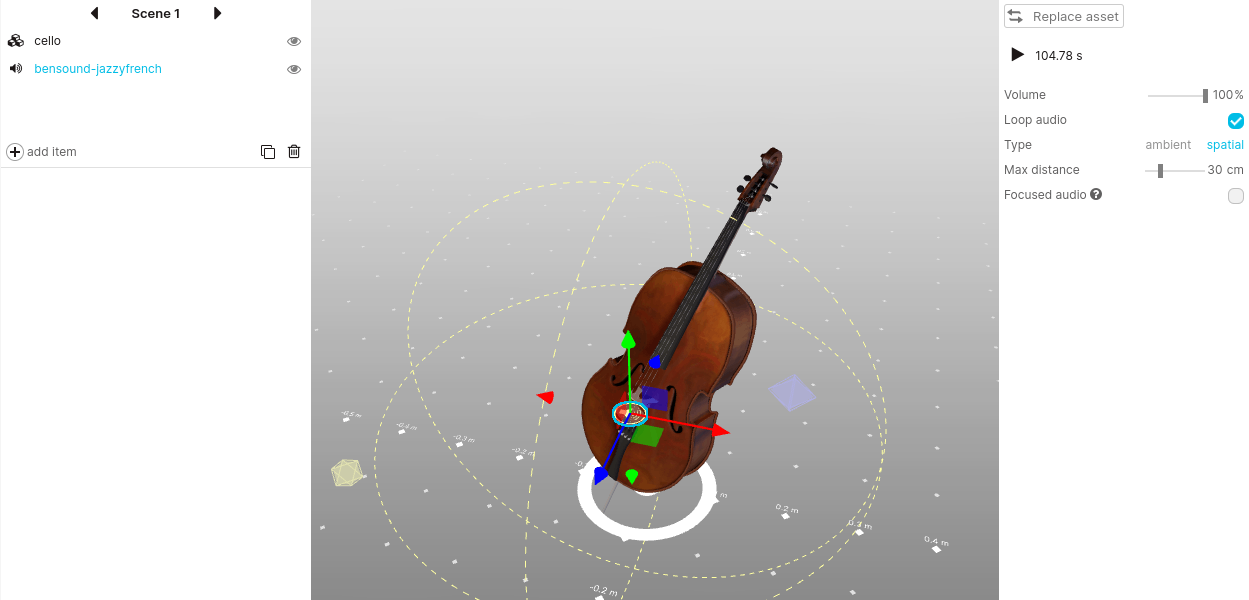
If a user is outside of the sphere, the audio item volume will be null.
If a user is inside the sphere, the audio volume is set considering its distance to the audio position. The closer to the source, the higher the volume.
Focused audio are only audible if the audio source is within the user field of view ( visible on screen )
Keep and audio playing between scenes
If you need to play a sound that should not be interrupted when changing scenes, don’t add to a scene, instead, use the Play audio action from the States engine to start playing the sound
March 16, 2023
With the photo & video module, users can take photos & record videos of their experience.
1. Activate the module in the modules section
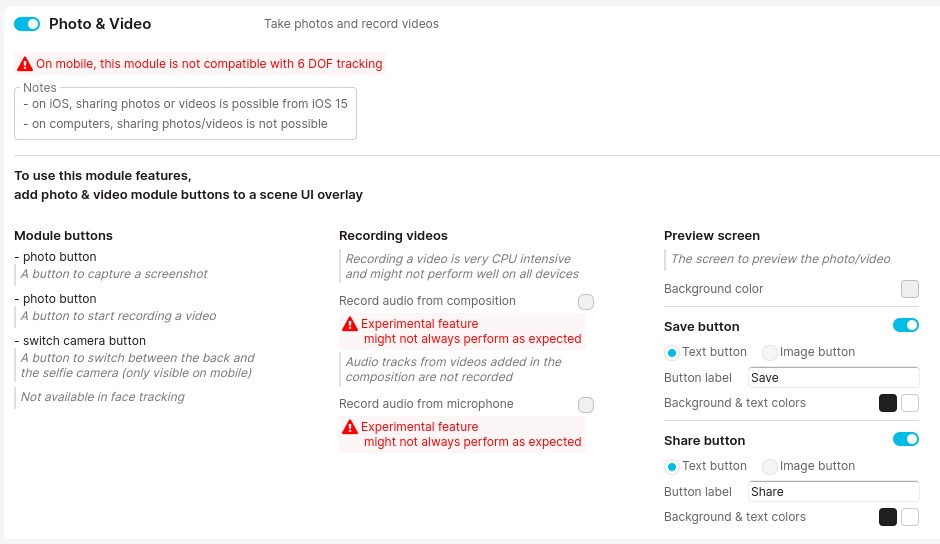
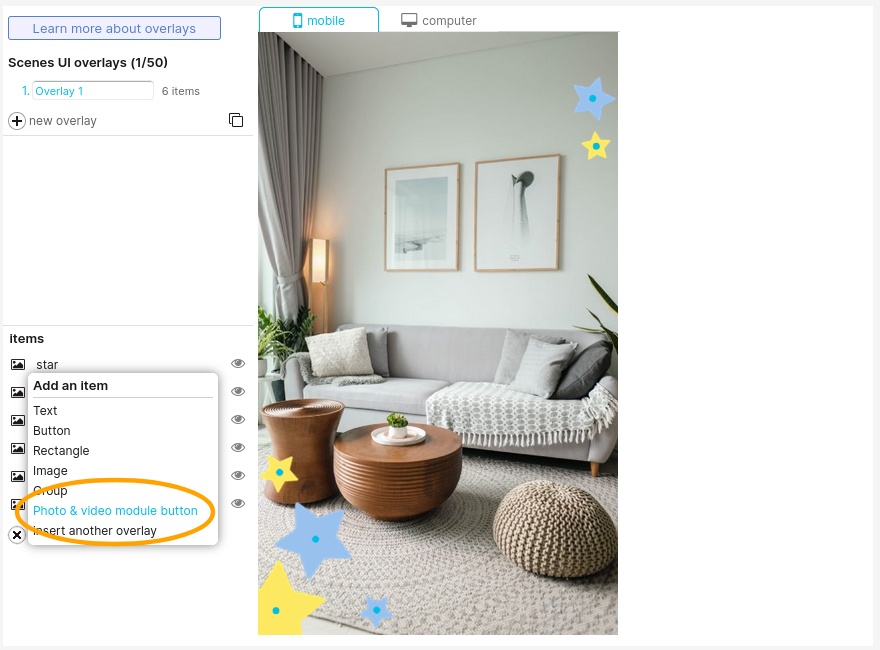
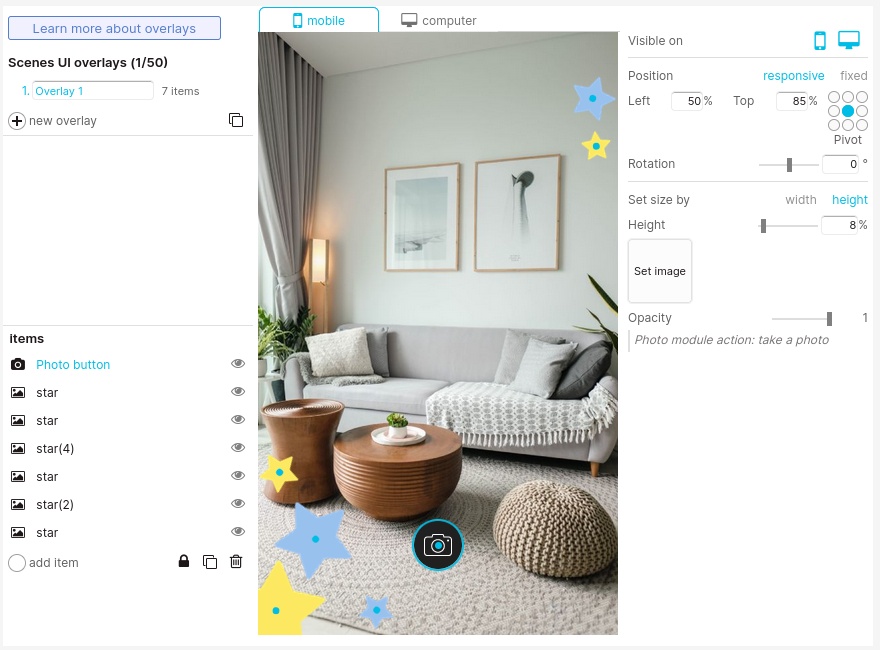
2. Add a photo or video button to a scene UI overlay
March 7, 2023
You can import .obj, .fbx and .glb (compressed gltf) 3D models up to 12 MB.
The 3D models can be animated.
We recommend importing 3D models with less than 100 000 triangle faces (polygons).
When importing a:
.obj model : neither textures nor animations are included
.fbx model : animations are included but not textures
.glb model : animations and textures are included
October 12, 2022
Add a colored layer placed at the back of the composition, the layer can be a gradient or a plain color, opaque or semi transparant
Trigger actions by pointing at composition items. When using the gaze trigger, you can trigger action without touching the screen, leaving the user hand free
September 10, 2022
The XR+ javascript API let developpers add front-end functionalities that do not exist in XR+, it also allows for a deeper UI / screens customization.
The API is a project module to enable in the studio
The API allows javascript file and CSS files to be loaded in the <body> of the project web document, with the usual <script> and <style> tags.
You must host those files, they are not hosted by XR+.
We provide a simple example – a javascript class – on how we recommend to communicate with the XR+ elements of the experience.
You can register and listen to particular events such as when the experience starts, or when an image marker is found/lost.
You can also setup your own events with the XR+ studio action editor. By doing so you can trigger an action on a composition item to call a function you have defined in your script.
download the javascript API class example
Those libraires are loaded by all projects and ready to use with the API:
considering: var XRAPI = new XRAPI_V1({});
| XRAPI.getIsLibraryLoaded(); | check if project library is fully loaded | boolean |
| XRAPI.getIsStarted(); | check if experience already started | boolean |
| XRAPI.getThreejsScene(); | get threejs scene | threejs scene |
| XRAPI.getCompositionItemByName(“my item name”); | get a composition item threejs root object by its name | threejs object |
| XRAPI.getCompositionParent(); | get parent off all threejs objects on the scene | threejs object |
| XRAPI.getDesktopScreenDomElement(); | get web dom element: desktop screen | dom element |
| XRAPI.getLoadingScreenDomElement(); | get web dom element: loading screen | dom element |
| XRAPI.getStartScreenDomElement(); | get web dom element: start screen | dom element |
| XRAPI.getMainScreenDomElement(); | get web dom element: main screen | dom element |
| XRAPI.goToScene(index); | change scene. Use index 1 for the first scene | |
| XRAPI.goToState(index); | change state. Use index 1 for the first state | |
| XRAPI.goToStateByUid(uid); | change state. Pass state uid as parameter |
the three.js library is currently available at the global scope ( but may only be available as a module import in future updates ).
You can use it directly this way:
const geometry = new THREE.BoxGeometry( 0.2, 0.2, 0.2 ); ...
for questions regarding the API, email us at: contactus@xr.plus
May 4, 2021
In this tutorial, you will learn how to create a very simple Web AR Project with an image.
First of all, you will need an XR.+ account, so go to the register page and create a free acount. Follow the steps to complete your registration, and now, let’s start your project!
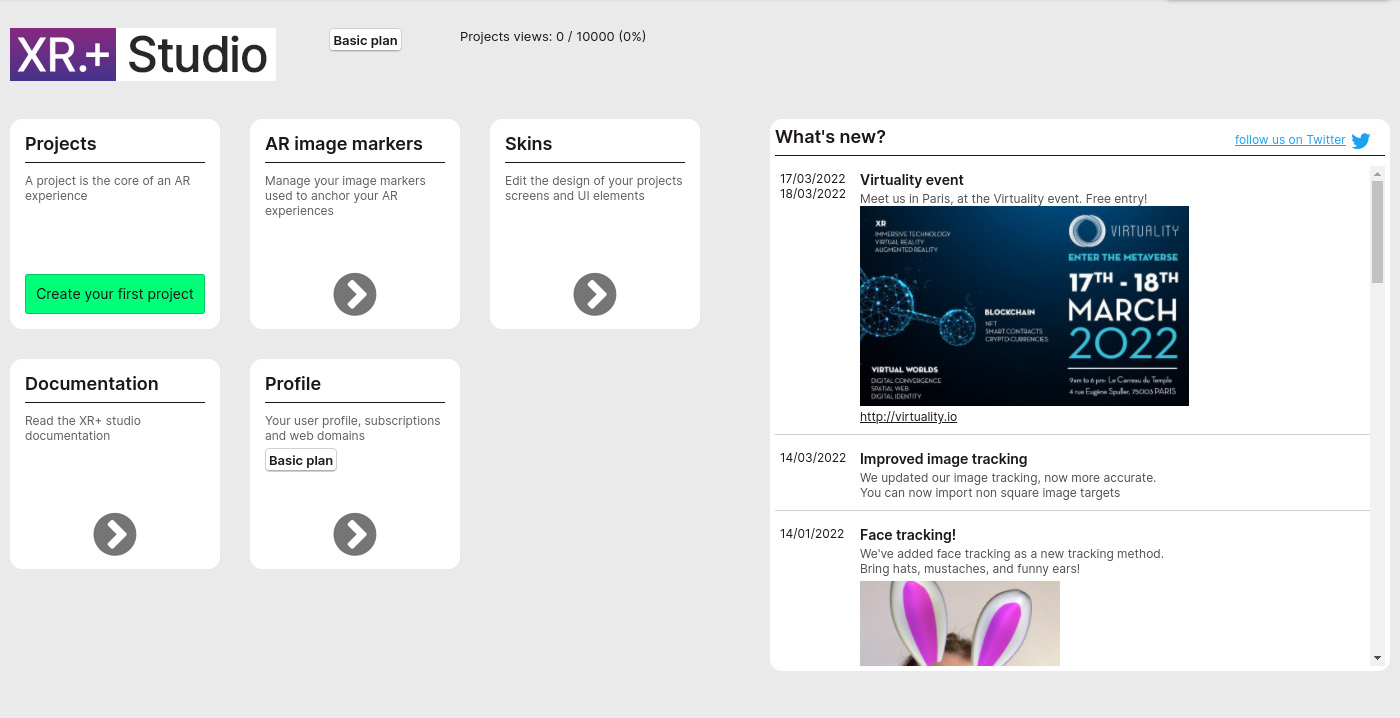
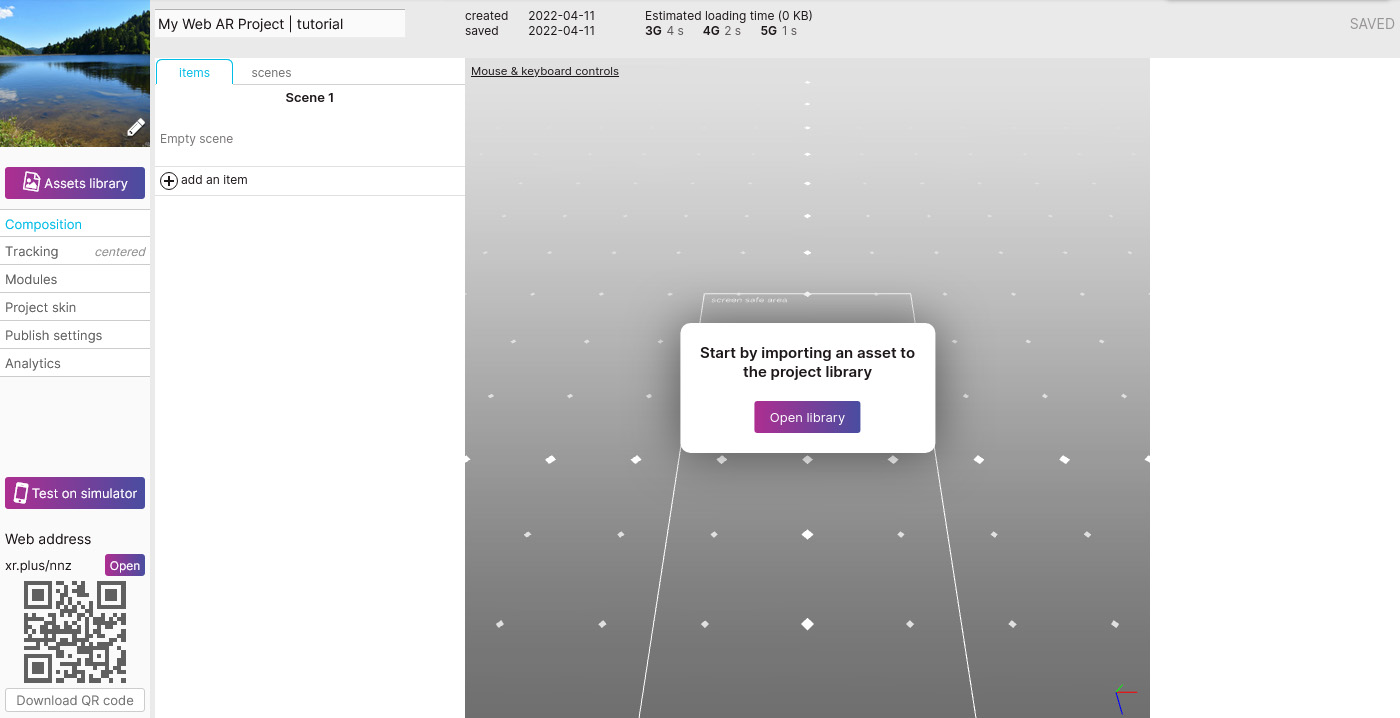
On the XR+ studio home screen, click on the “Create your first project” button.
Name your project and click on “Create project”.
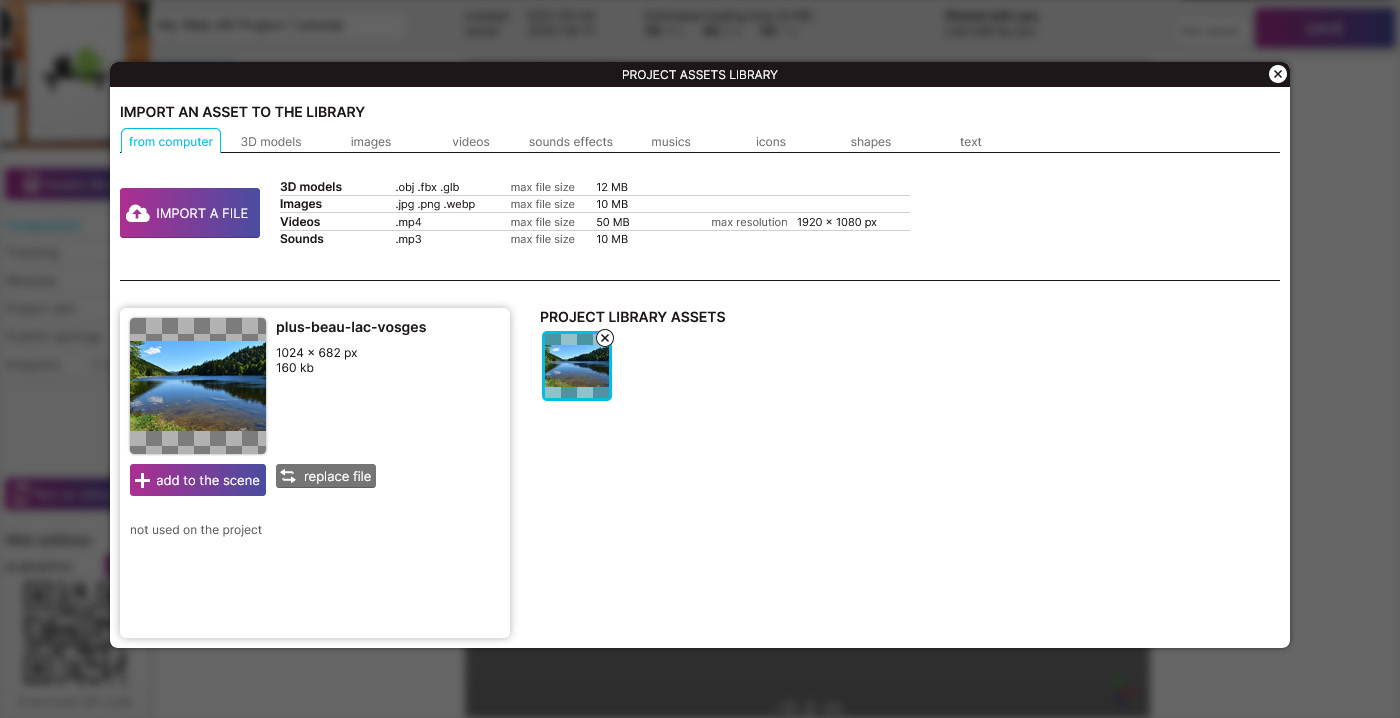
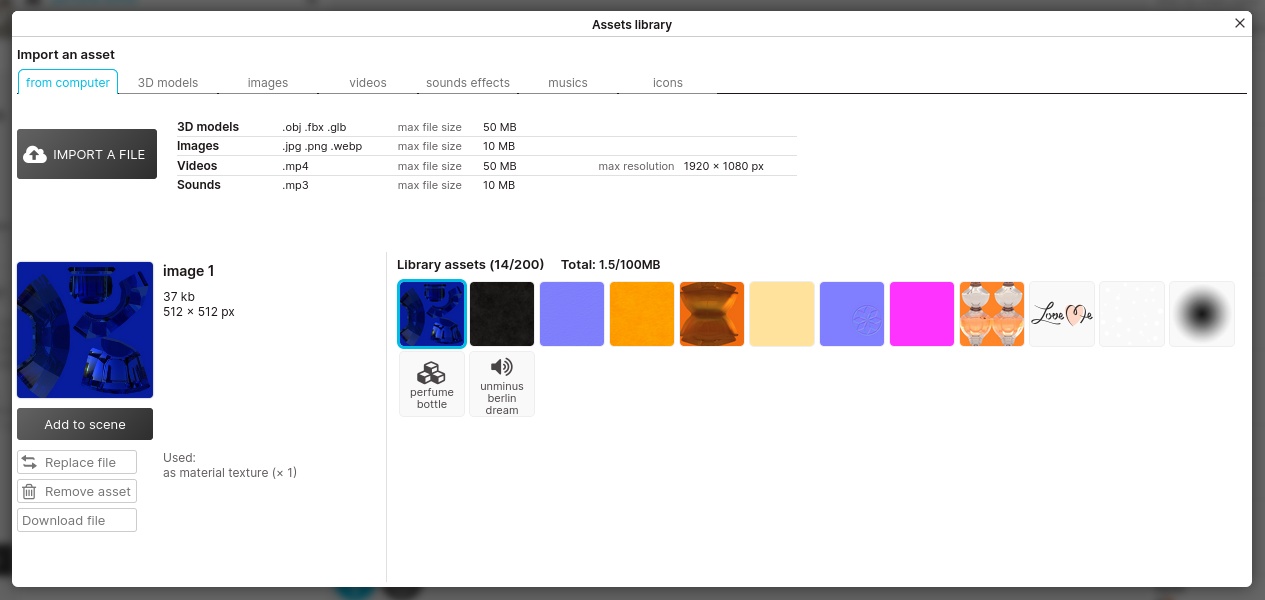
Welcome to the main project edition screen! Open your assets library by clicking on “Open library”, which is empty for now.
Import your image by clicking on the button named “Import a File”, then click on the “Add to scene” button.
Now, we have your image in the 3D space of the editor. You can move it by selecting one of the two main tools of the view in the bottom left corner. Place it at your will. You can resize it or move it by entering the coordinates in the tool bar at the bottom of the 3D view.
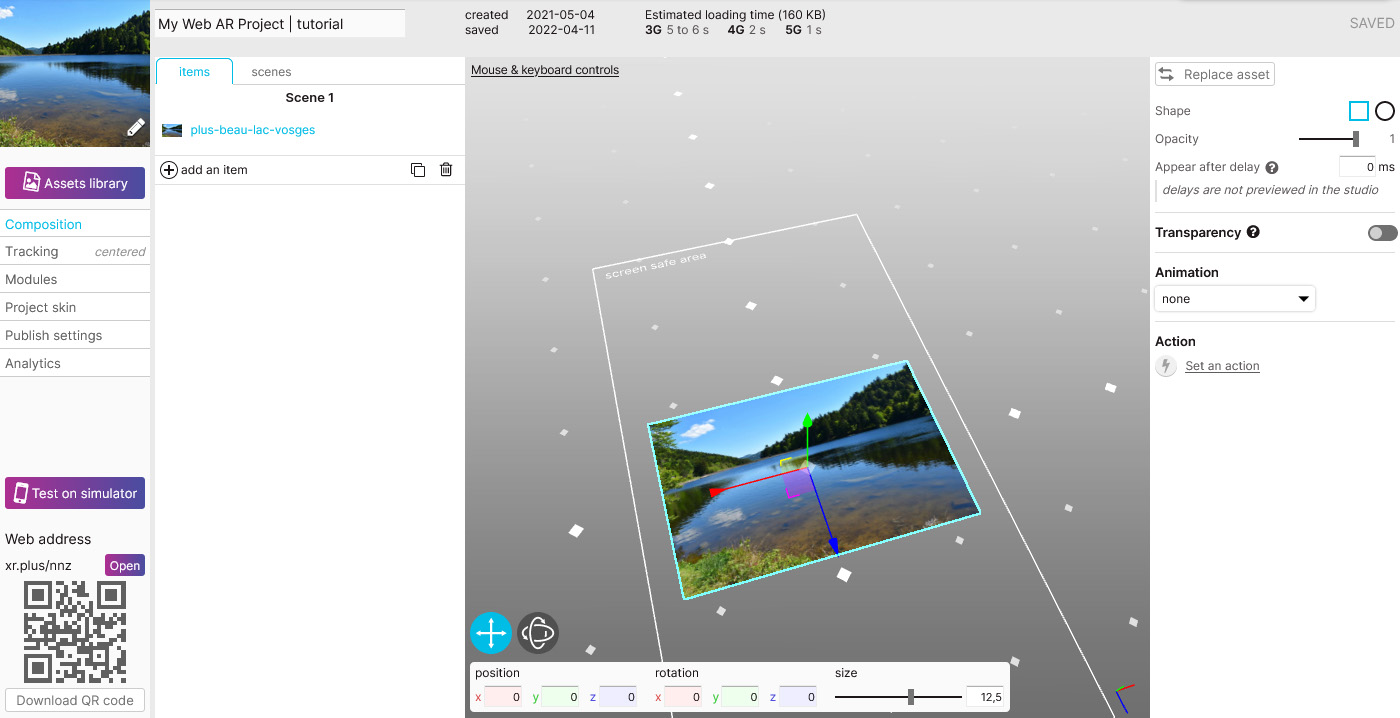
Your project is already published and live, above to the QR code, you can see the public link to the project, in this case: https://xr.plus/nnz (yours will be different).
Type this web address on your phone web browser or scan the QR code in the editor to view the project in web augmented reality.
Congratulation you’ve made it!
April 26, 2021
XR+ provides the highest level of compatibility with smartphones to deliver advanced AR / VR experiences to 3+ billions of end users
 | iOS iPhones and iPads running on iOS 14 or newer, that’s all iOS devices launched since 2017 Android Android phones launched since 2020 with a minimum of 2GB RAM |
WebXR projects made with the XR+ studio are compatible with all major web browsers
| Chrome | Safari | Firefox | Samsung internet | Edge |
XR+ supports Oculus Quest 1, 2 & 3, Meta Quest Pro, PICO 4, and the combo Chrome + Oculus / HTC Vive on computers
April 21, 2021
Import assets to the project library so you can use them in scenes, overlays, modules…
3D models
You can import .obj, .fbx and .glb (compressed gltf) files up to 12 MB.
The 3D models can be animated.
We recommend importing 3D models with less than 100 000 triangle faces (polygons).
Images
You can import .jpg, .png and .webp images
Videos
You can import .mp4 videos files
Maximum resolution: 1920 x 1080 pixels
Maximum size: 50MB
When imported, videos files are resized for webXR performance considerations.
To produce, edit , and crop your video before importing them to the studio, we recommend using Pikimov, a free web-based video editor.
Audio files
You can import .mp3 files up to 10 MB.