
In this tutorial, you will learn how to create a very simple Web AR Project with an image.
First of all, you will need an XR.+ account, so go to the register page and create a free acount. Follow the steps to complete your registration, and now, let’s start your project!
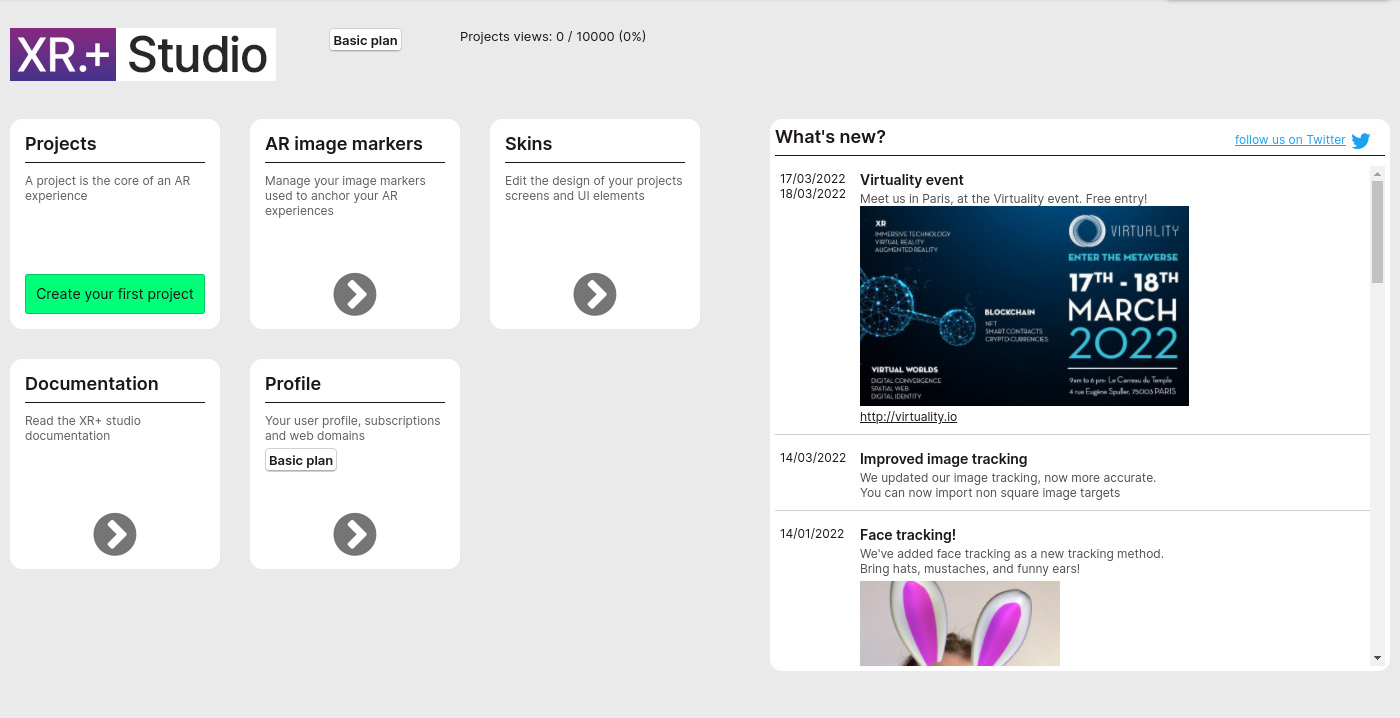
On the XR+ studio home screen, click on the “Create your first project” button.
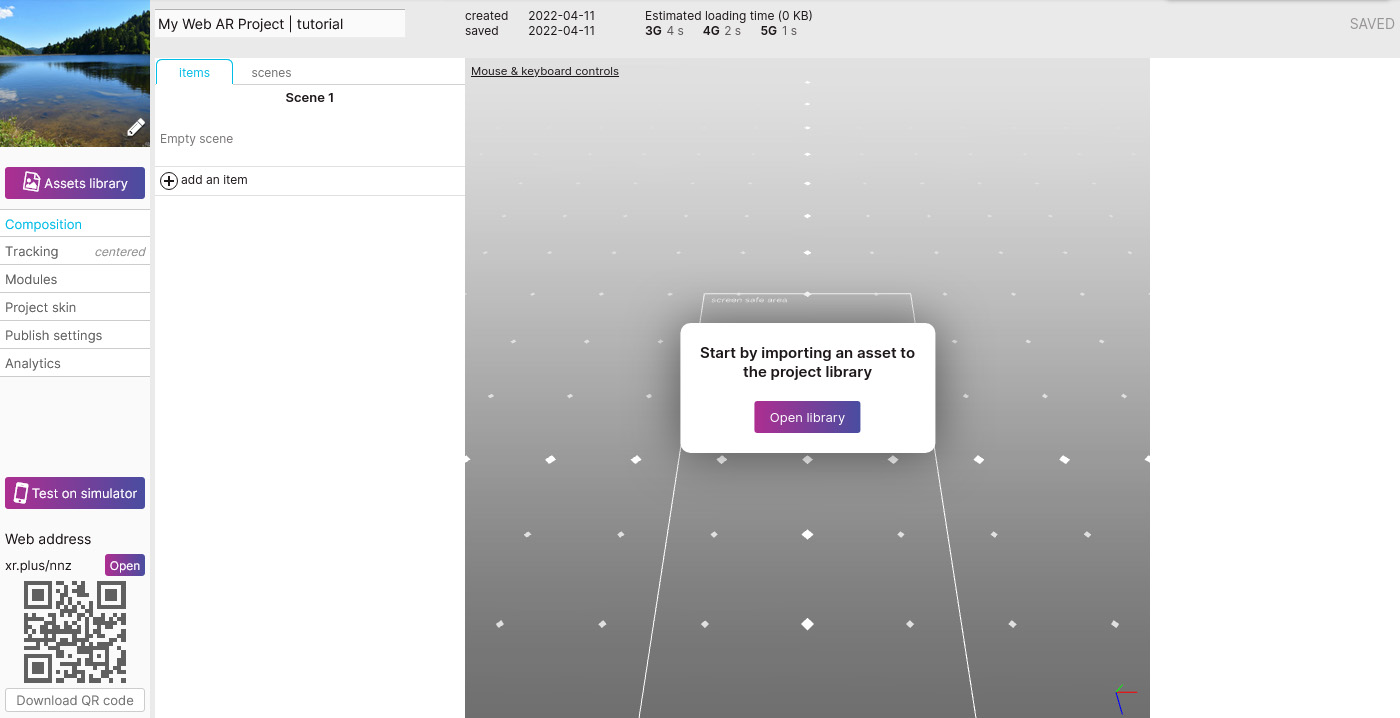
Name your project and click on “Create project”.
Welcome to the main project edition screen! Open your assets library by clicking on “Open library”, which is empty for now.
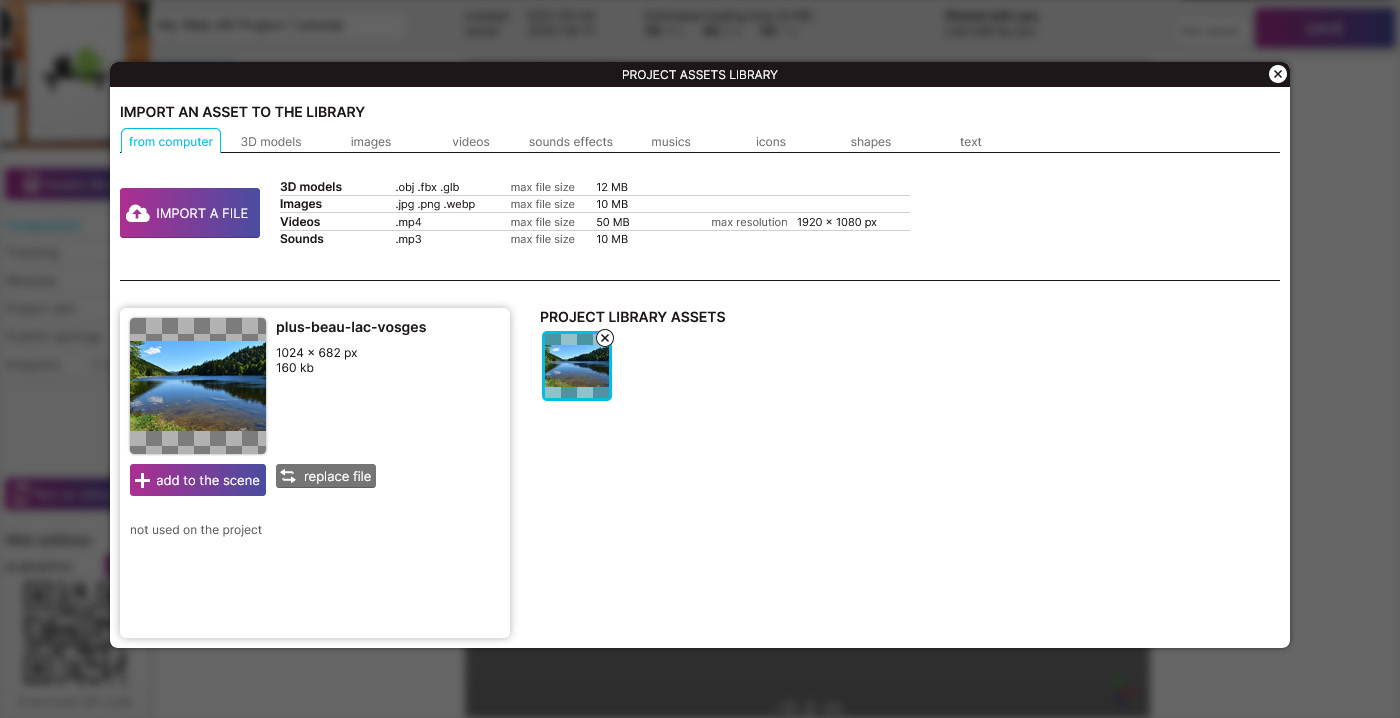
Import your image by clicking on the button named “Import a File”, then click on the “Add to scene” button.
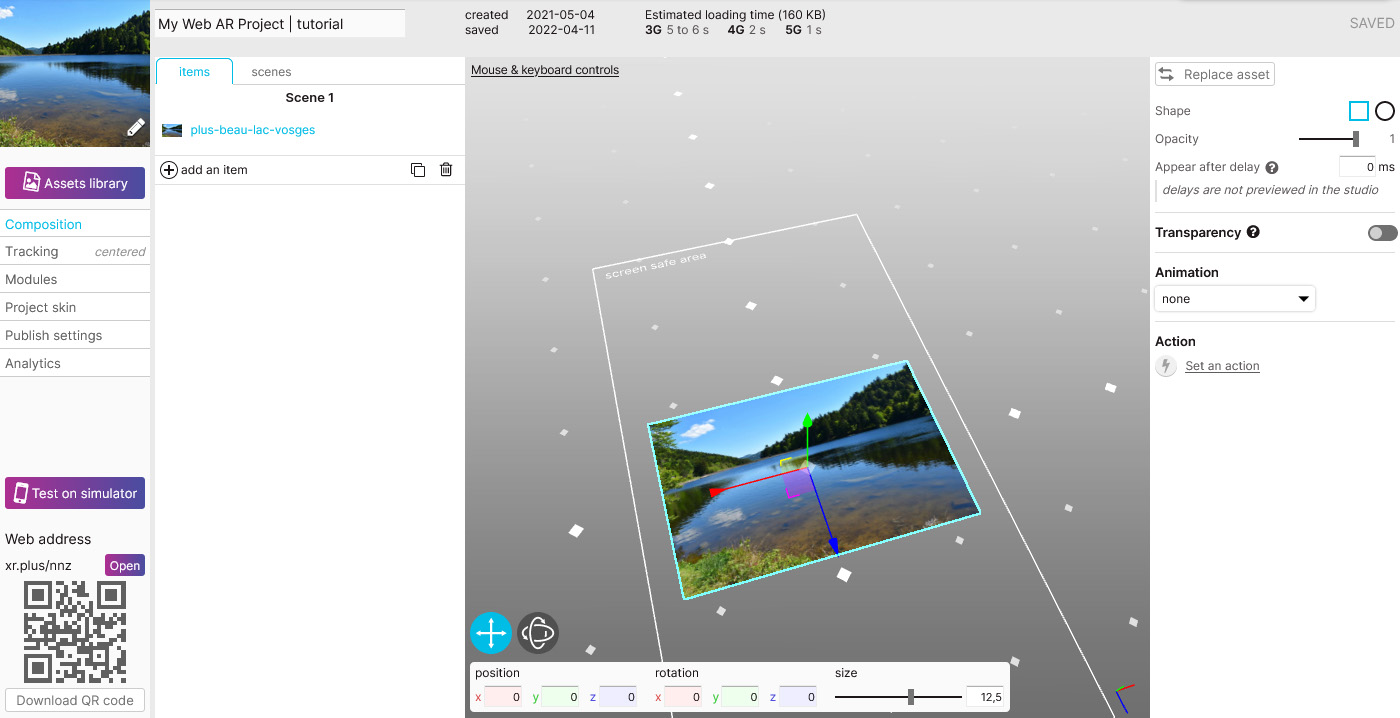
Now, we have your image in the 3D space of the editor. You can move it by selecting one of the two main tools of the view in the bottom left corner. Place it at your will. You can resize it or move it by entering the coordinates in the tool bar at the bottom of the 3D view.
Your project is already published and live, above to the QR code, you can see the public link to the project, in this case: https://xr.plus/nnz (yours will be different).
Type this web address on your phone web browser or scan the QR code in the editor to view the project in web augmented reality.
Congratulation you’ve made it!