May 4, 2021
In this tutorial, you will learn how to create a very simple Web AR Project with an image.
First of all, you will need an XR.+ account, so go to the register page and create a free acount. Follow the steps to complete your registration, and now, let’s start your project!
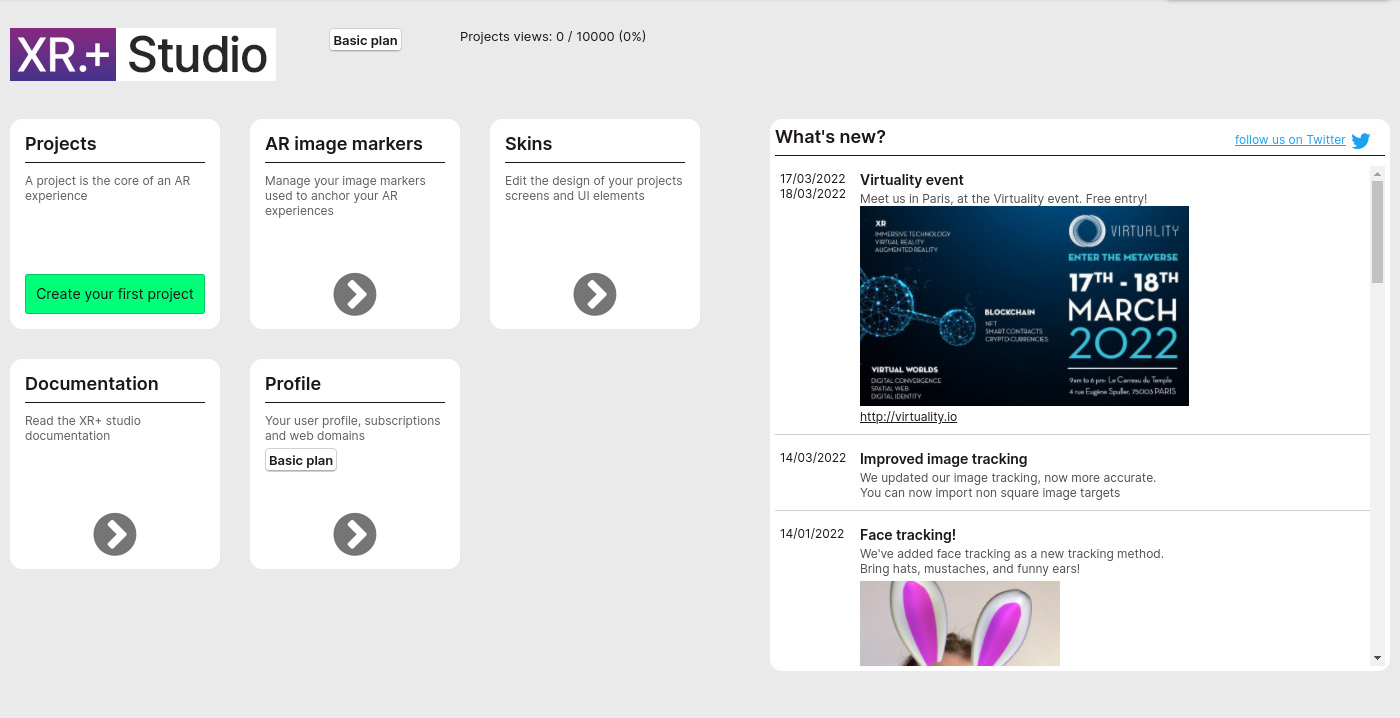
On the XR+ studio home screen, click on the “Create your first project” button.
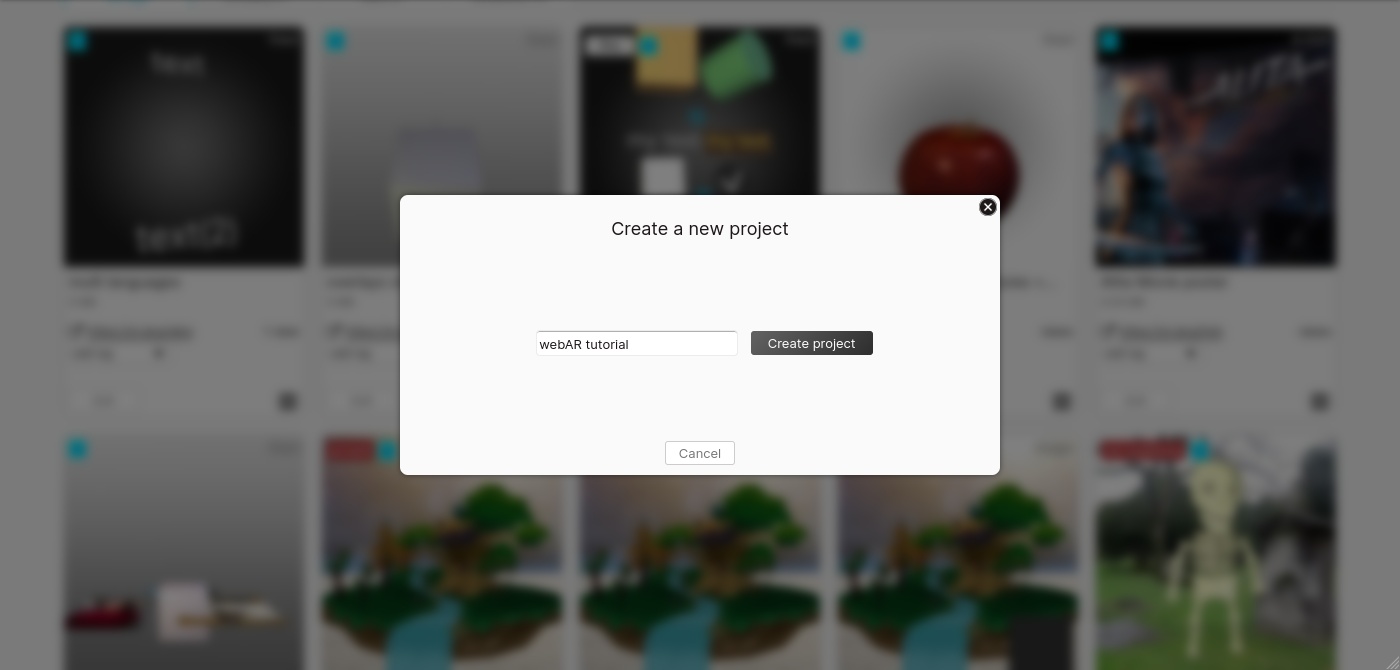
Name your project and click on “Create project”.
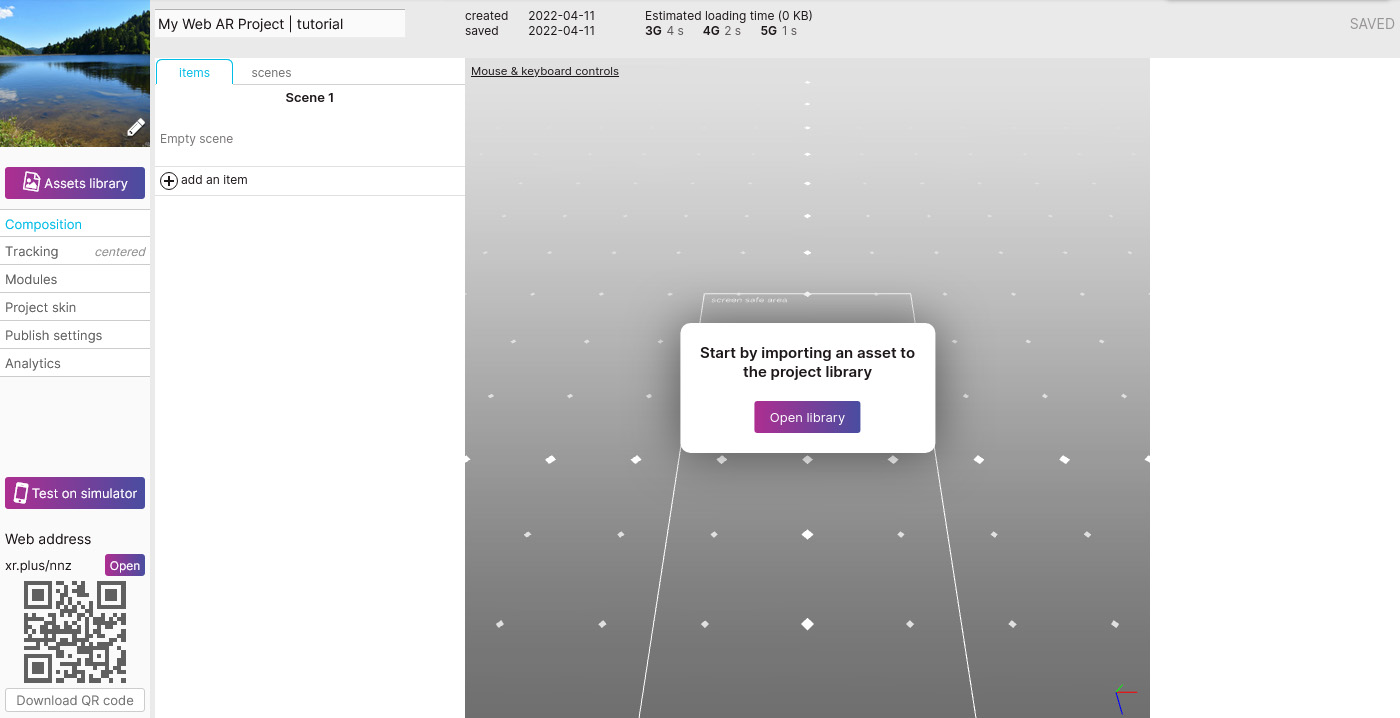
Welcome to the main project edition screen! Open your assets library by clicking on “Open library”, which is empty for now.
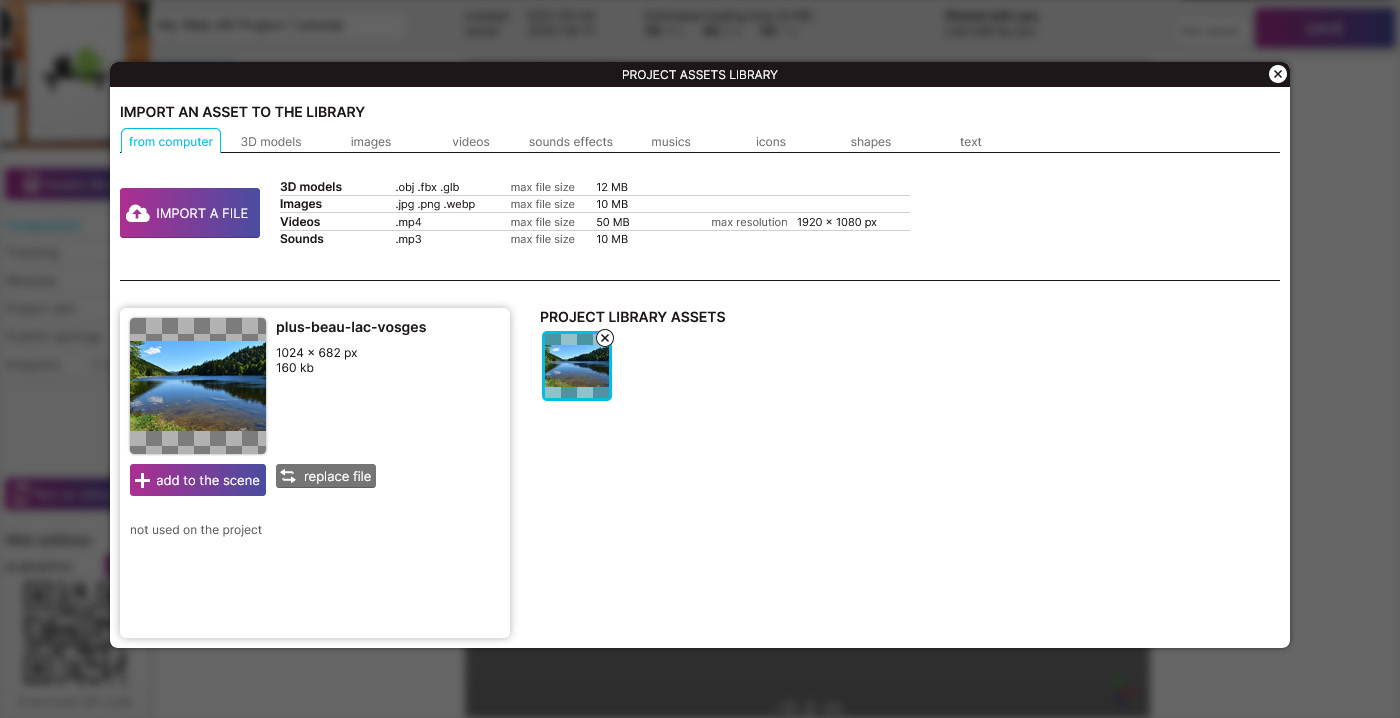
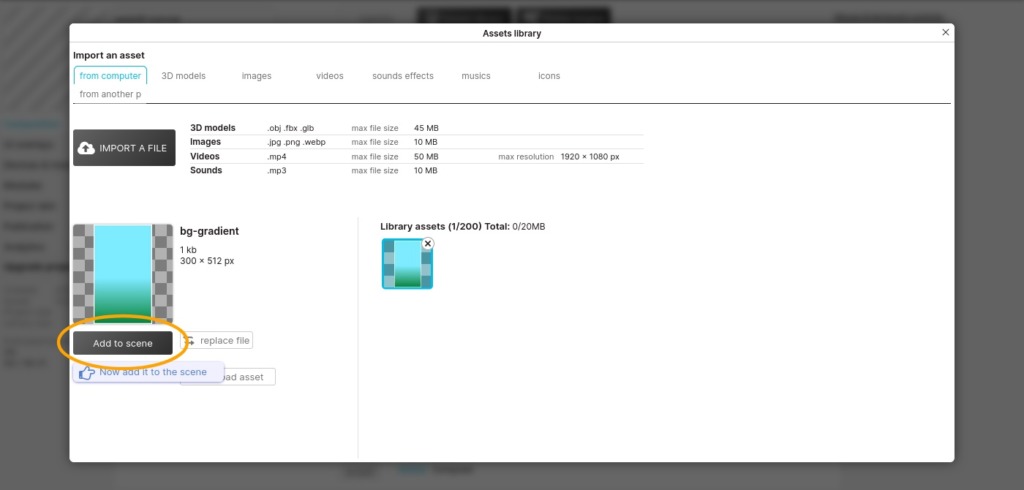
Import your image by clicking on the button named “Import a File”, then click on the “Add to scene” button.
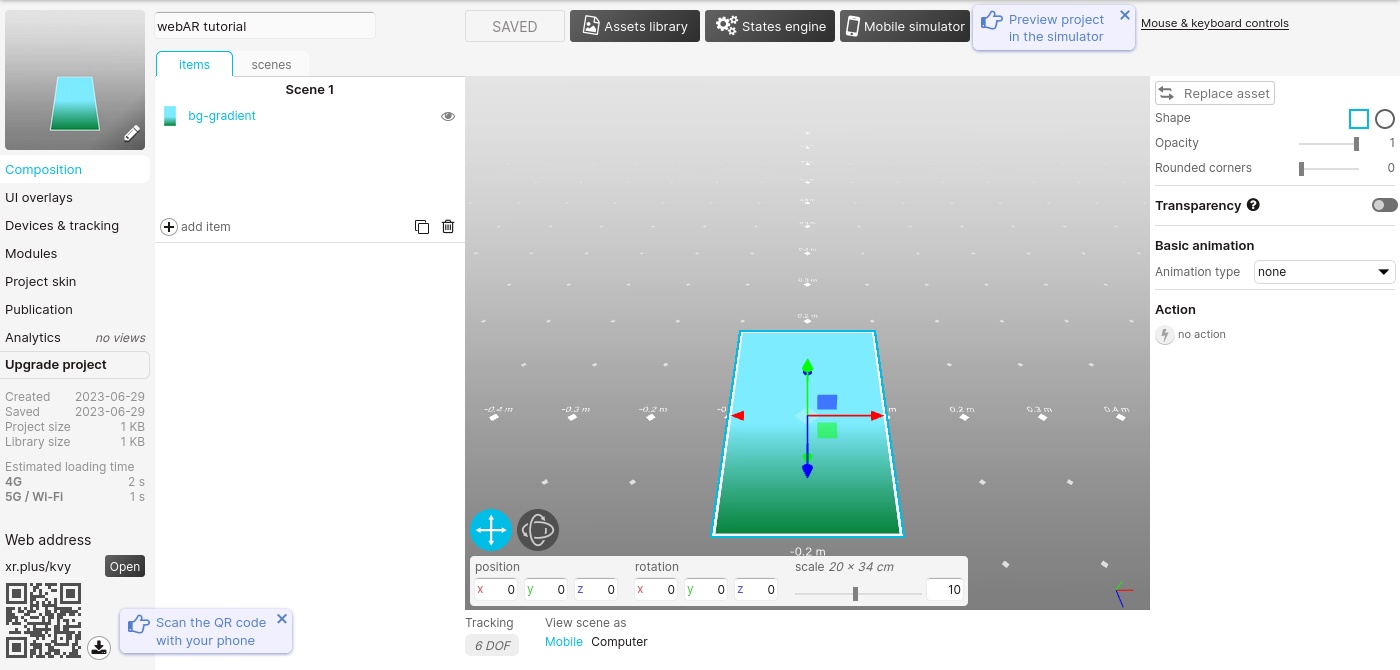
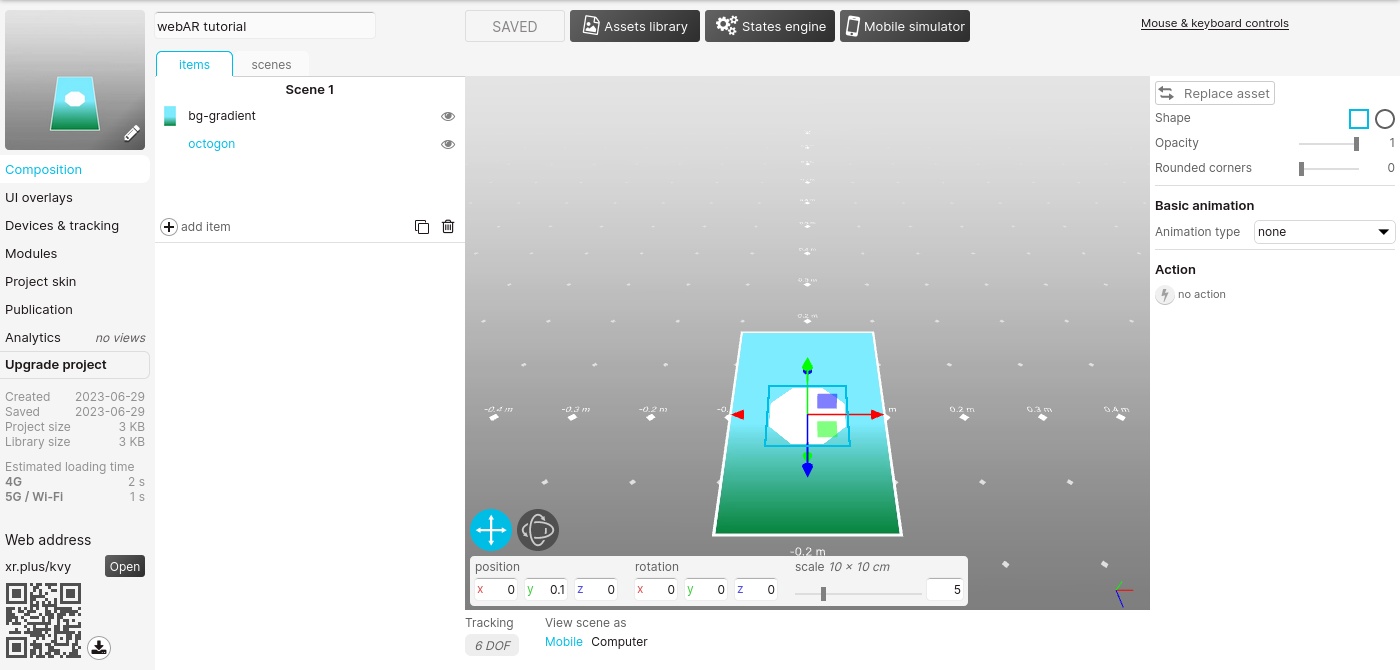
Now, we have your image in the 3D space of the editor. You can move it by selecting one of the two main tools of the view in the bottom left corner. Place it at your will. You can resize it or move it by entering the coordinates in the tool bar at the bottom of the 3D view.
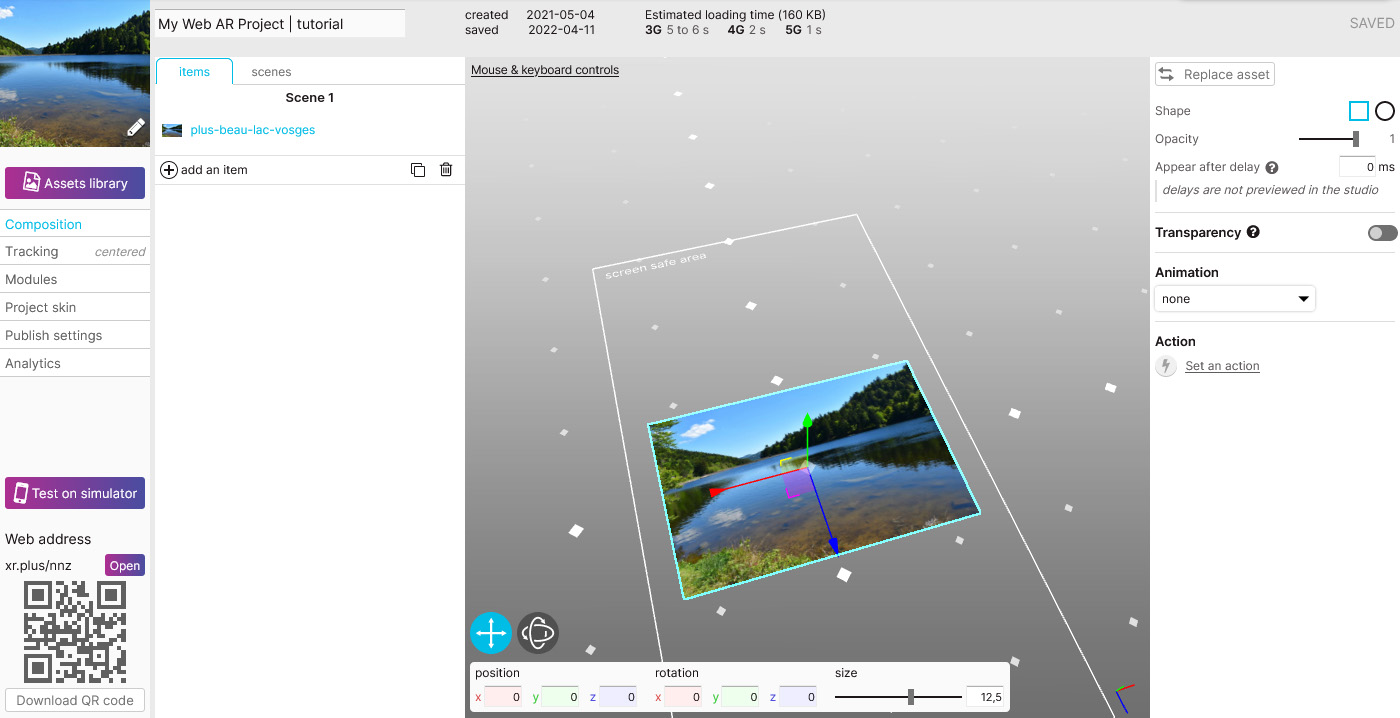
Your project is already published and live, above to the QR code, you can see the public link to the project, in this case: https://xr.plus/nnz (yours will be different).
Type this web address on your phone web browser or scan the QR code in the editor to view the project in web augmented reality.
Congratulation you’ve made it!
Here’s a simple tutorial on how to publish a 3D model in augmented reality on the web ( aka webAR ).
Let’s go through the various steps on the xr.plus platform…
If you don’t have yet an xr.plus account, create one ( the basic plan is free )
Click here to create a free account
Create a new project and import a 3D model from your hard drive. Supported formats are .obj, .fbx and .glb (gltf).
For this tutorial, I’m using a Bonsai tree available here (download the fbx version).
This model was made by Scopia Visual Interfaces Systems, s.l. and Eteks,
available under the Creative Commons license ( https://resources.blogscopia.com/license-2/ ).
Is it also possible to make a project only from images, but I’ll only cover the 3D model process in this tutorial.
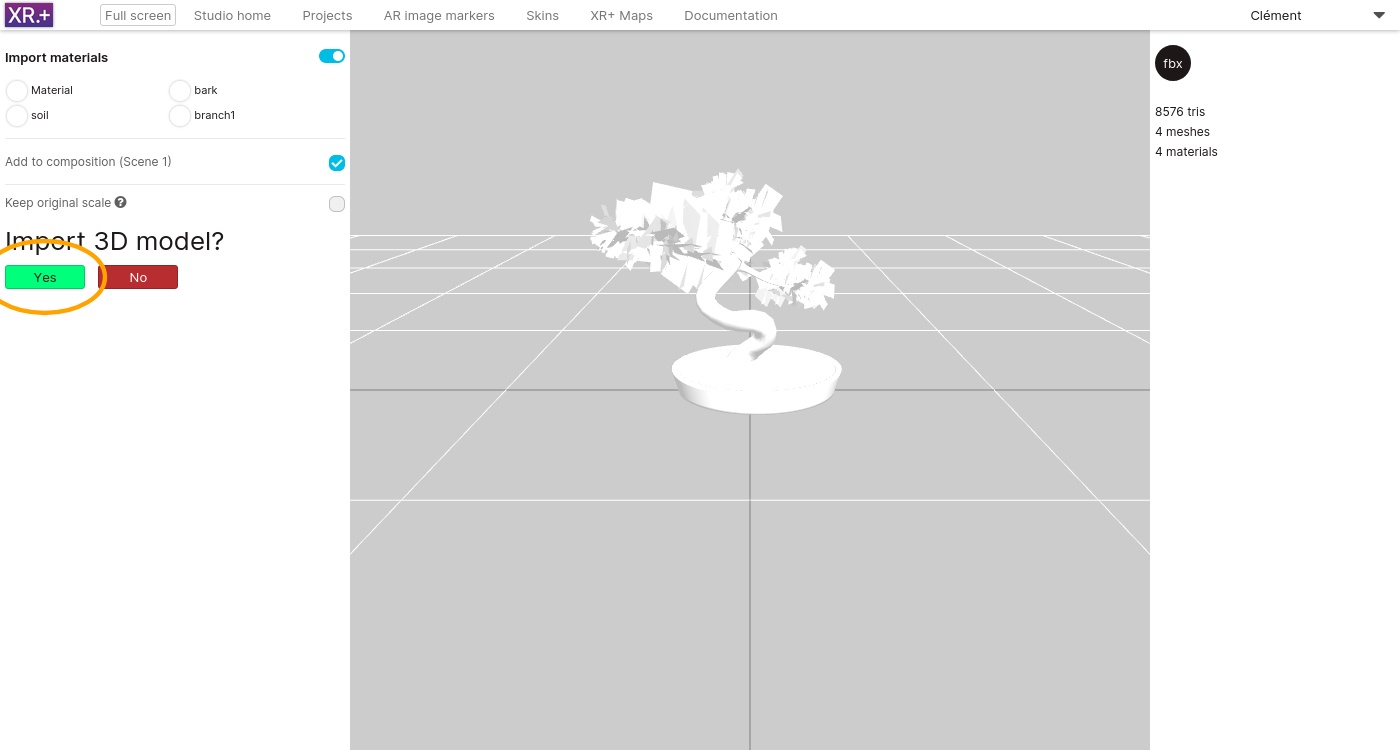
If the imported model includes materials, you will be asked if you wish to import them.
For this model I’m choosing ‘yes’, so materials will be automatically assigned to the meshes.
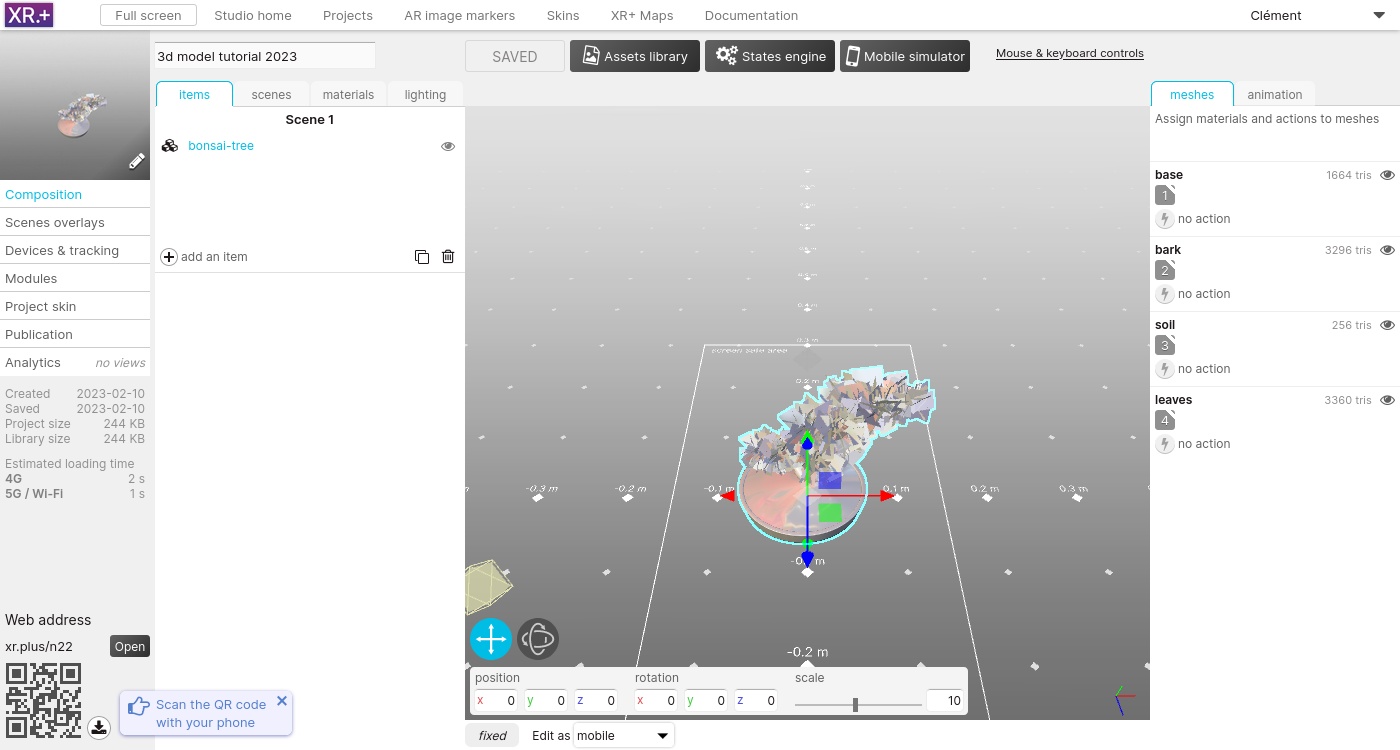
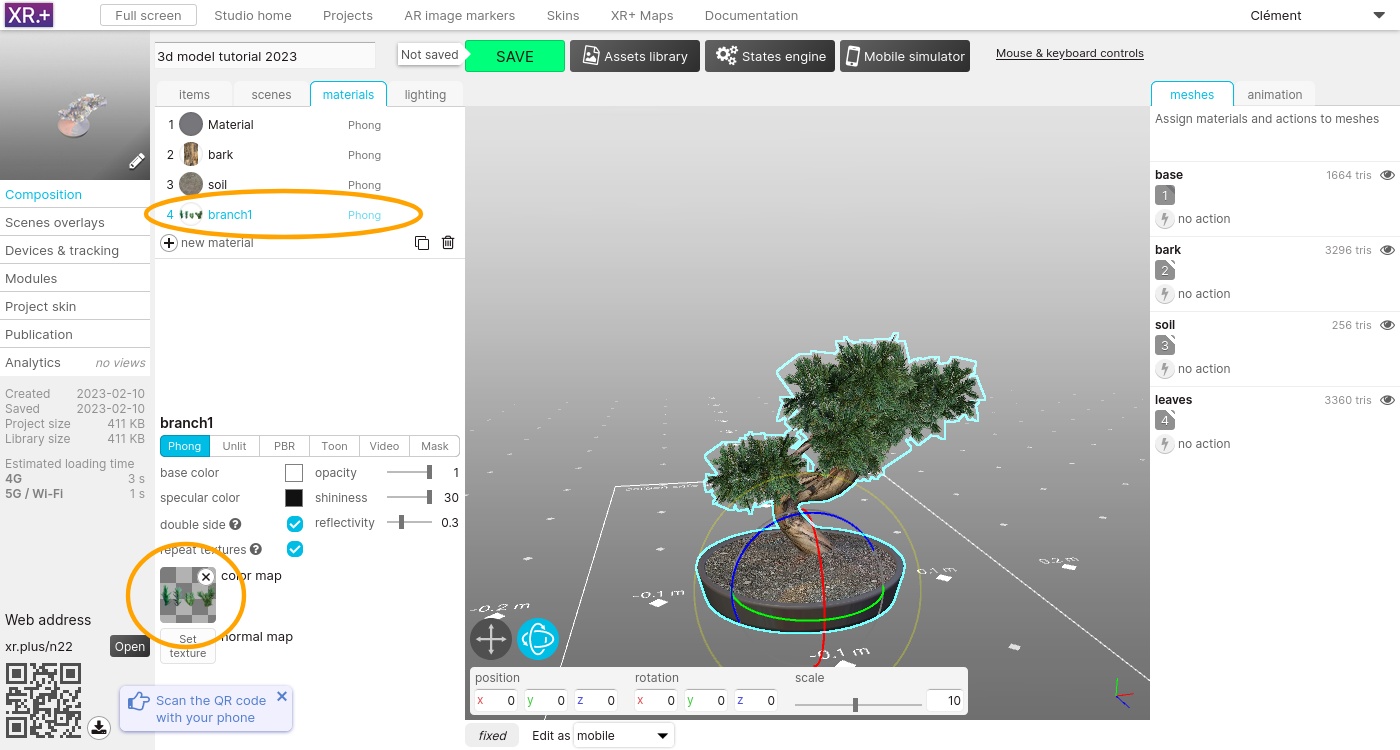
This is the 3D composition view:
– on the left column you can see the list of all items dropped in the composition (here there is only the bonsai tree)
– on the left column you can also switch to scenes, materials and lights listing.
– the right hand side column displays the list of meshes from the model. This is where you can assign materials to model meshes
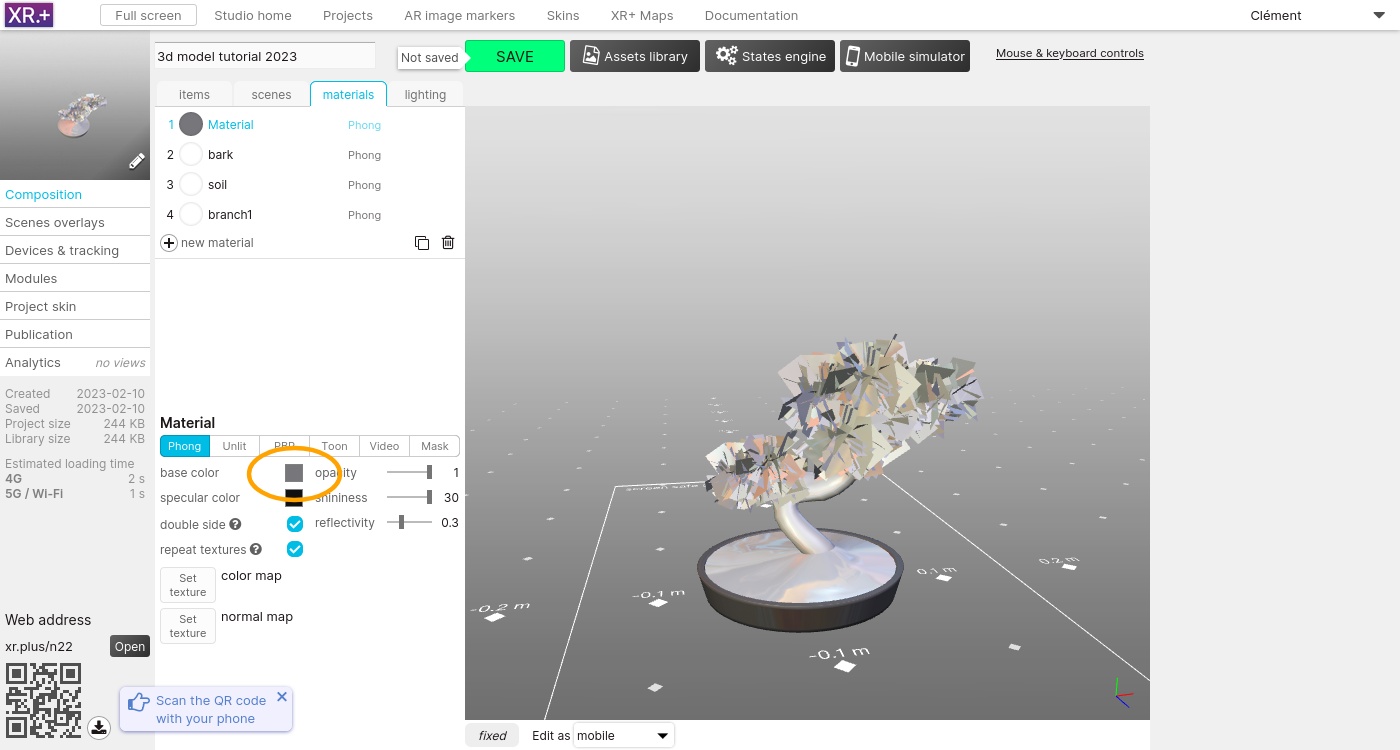
The top material is used on the tree pot, I’m choosing a dark gray for its color
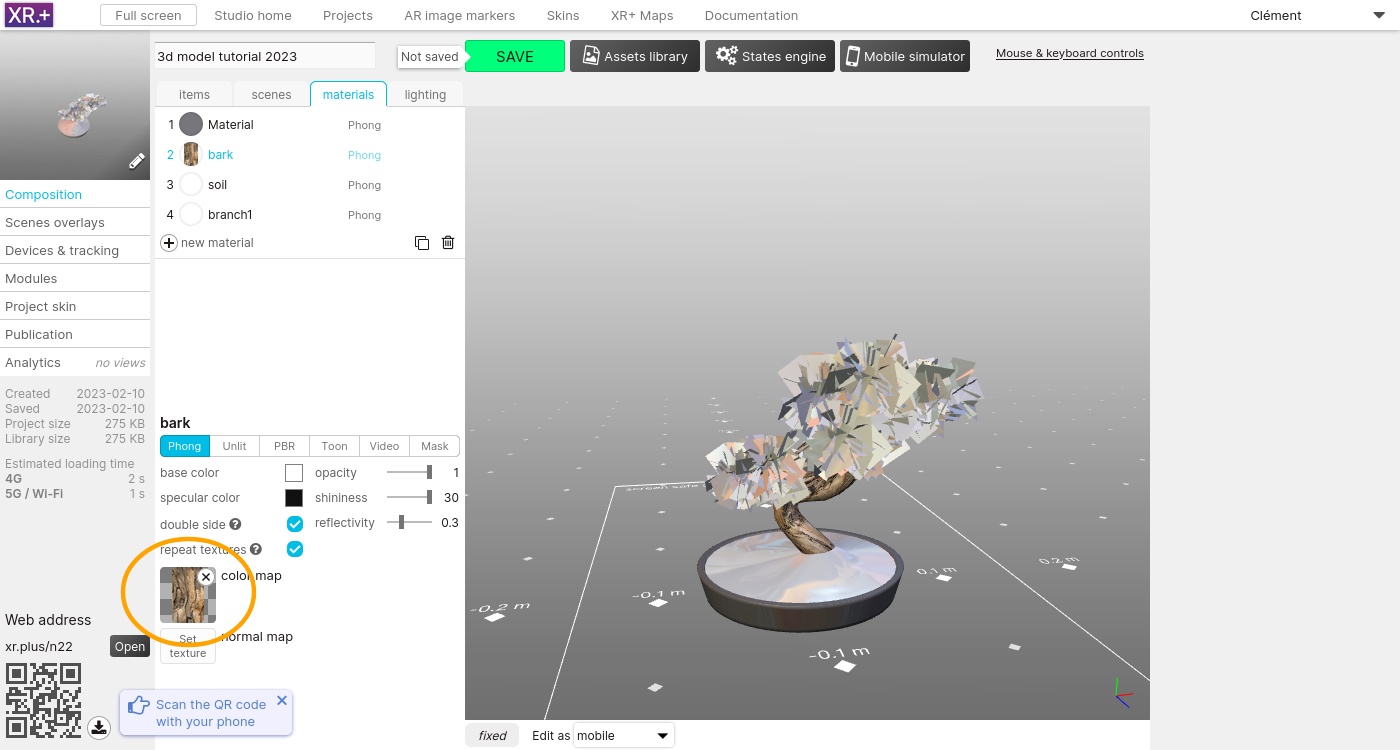
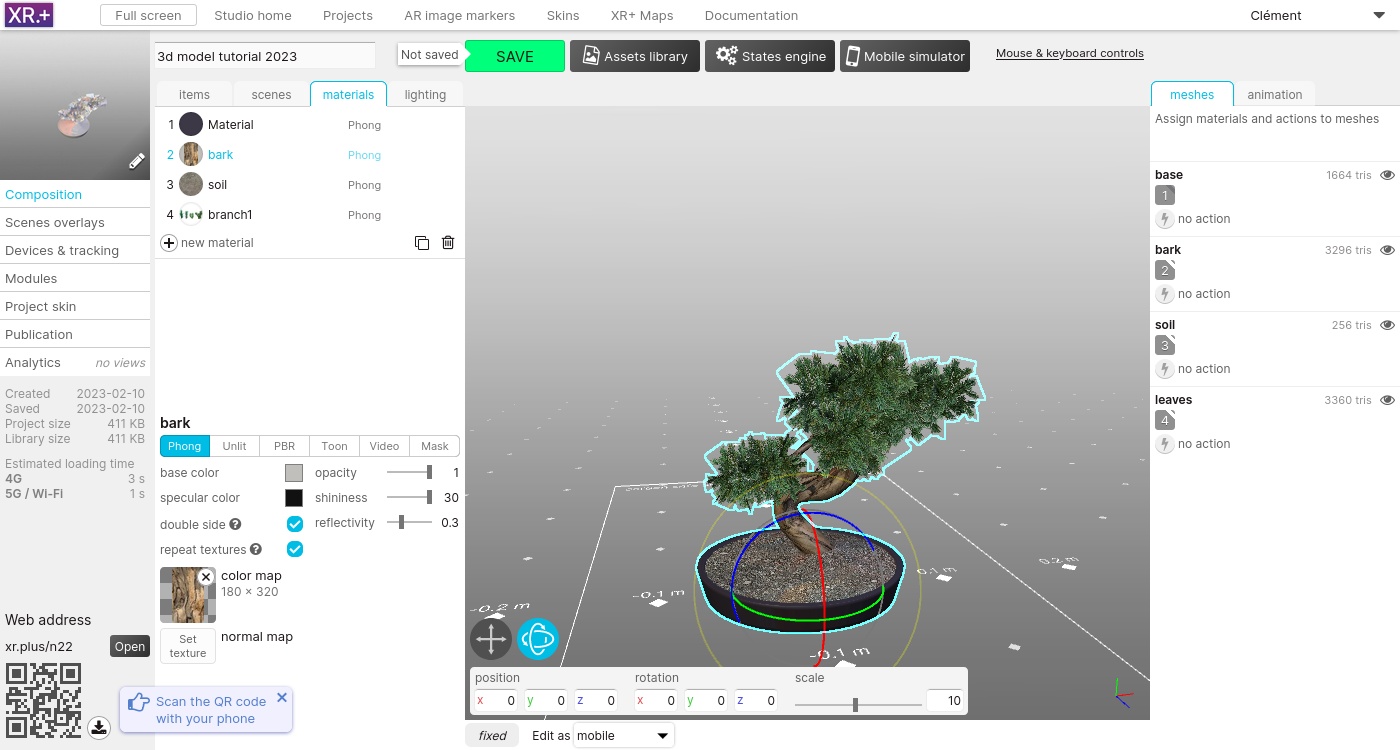
Adding the texture for the trunk (included with the model zip file), on the ‘bark’ material
Adding textures for the soil and leaves.
Some extra material adjustments to darken a bit more the pot and the trunk (changing the default white color of a material to a darker color will also affect the texture), and lowering the shininess of the trunk.
Finally, set the tracking mode to 6DOF SLAM

Your project is now ready and already published!
On the left column, you can see the public link to your project, in this case: https://xr.plus/2m5
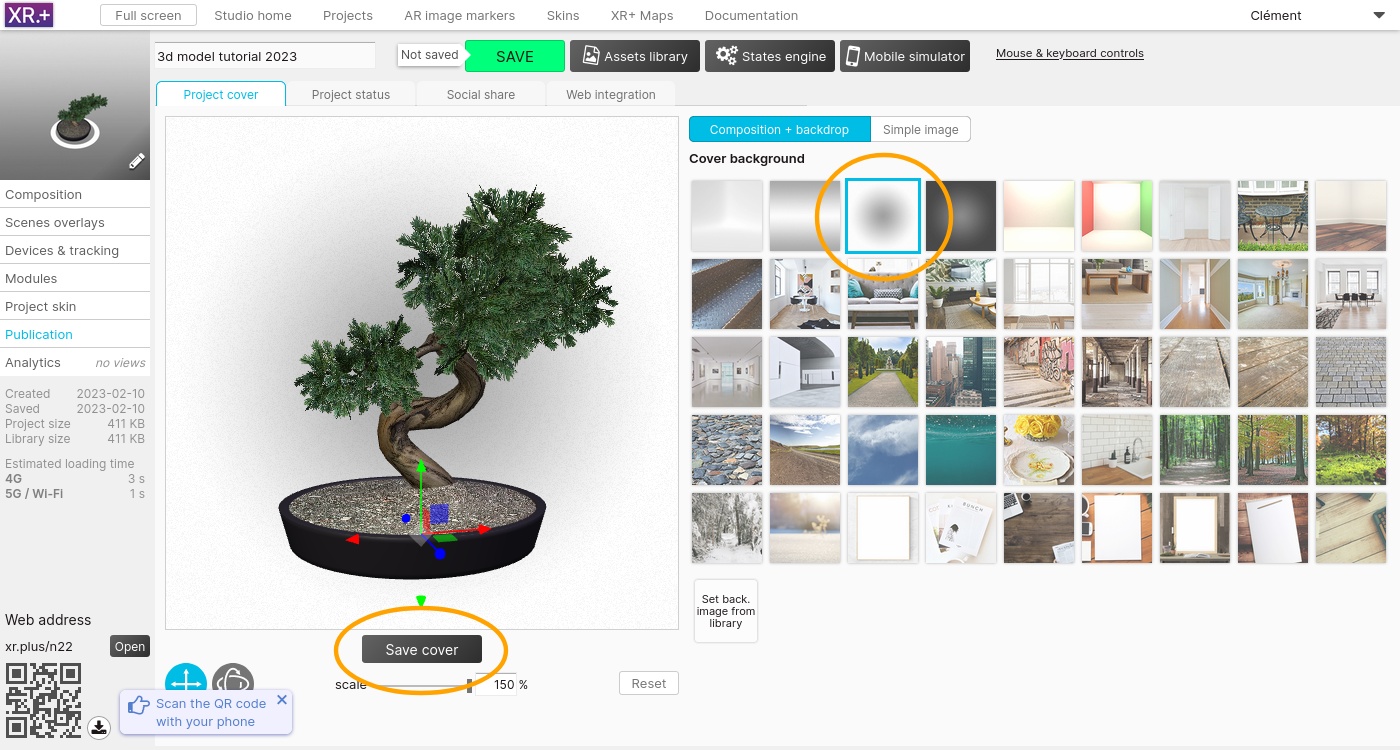
You can customize the project cover image, to do so, go to ‘Publication’ > ‘Project cover’.
You can select an image for the cover background and adjust the position and size of the Bonzai tree.
You can import an image from your hard drive to be used as a cover.
Click ‘save cover’ to update the project cover.
Let’s have a simple step by step tutorial on making a web AR scene from images.
This tutorial is about making a composition from images, if you’re looking for the 3D model tutorial, go here
If you don’t have yet an xr.plus account, create one
Click here to create a free account
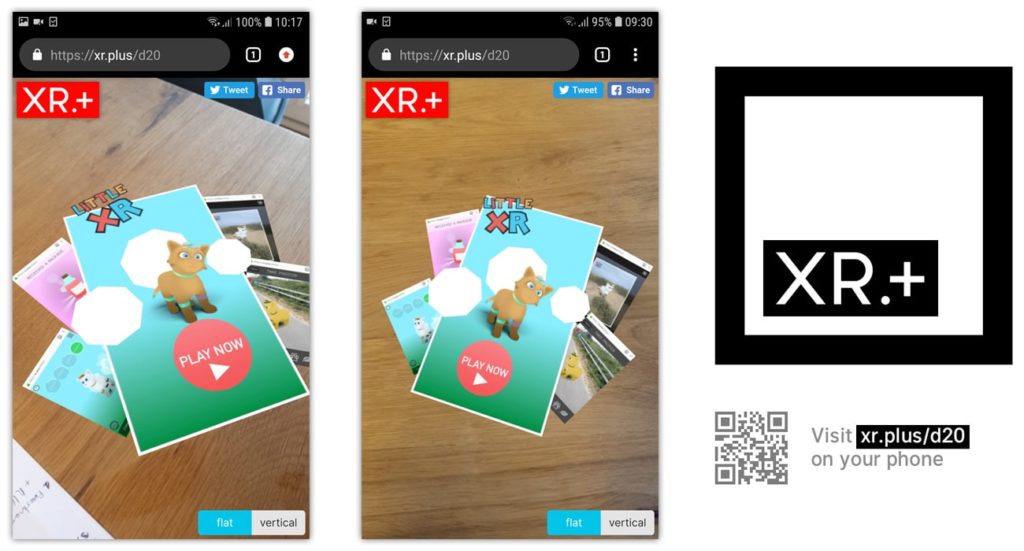
We are going create a simple composition that will look like this when finished.
You can download all the images used in this composition here: tutorial-composition.zip. Of course you can also use your own images.
in the XR+ studio, create a new project.
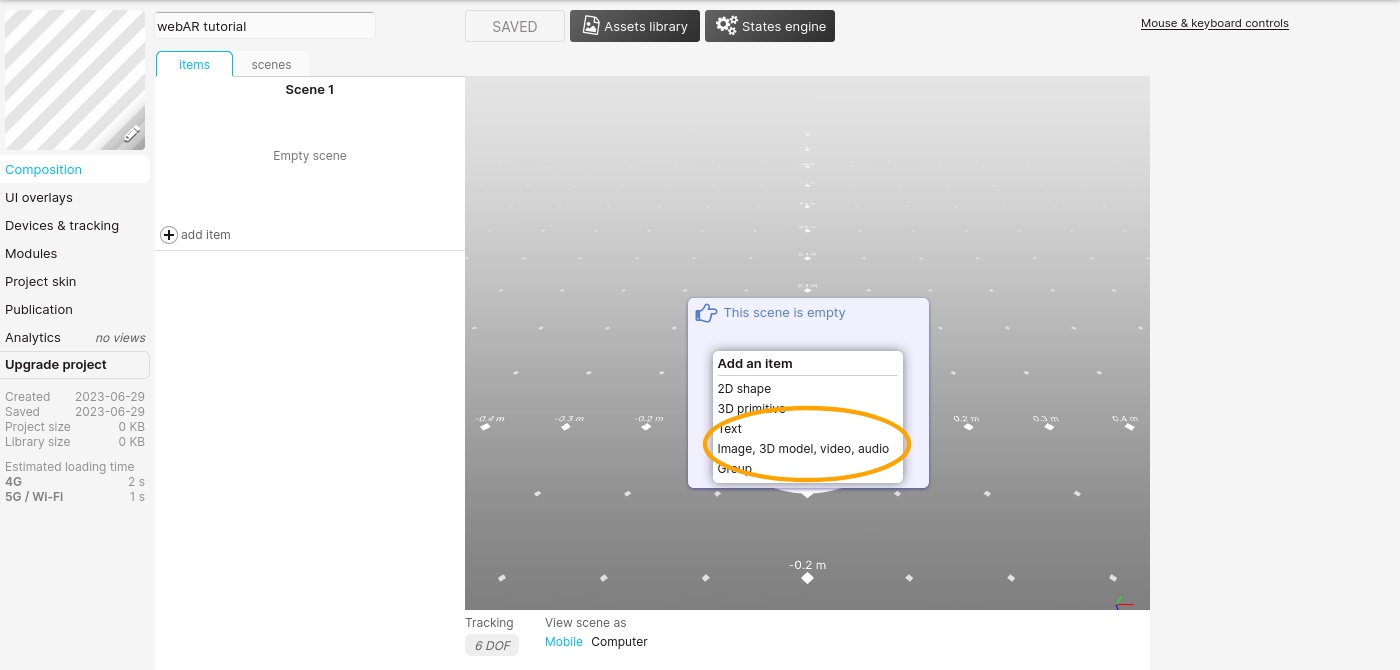
In the list, choose ‘image’, then ‘open assset library’, click “import a file”. Import the file ‘bg gradient.png’, then click on “add to scene”.
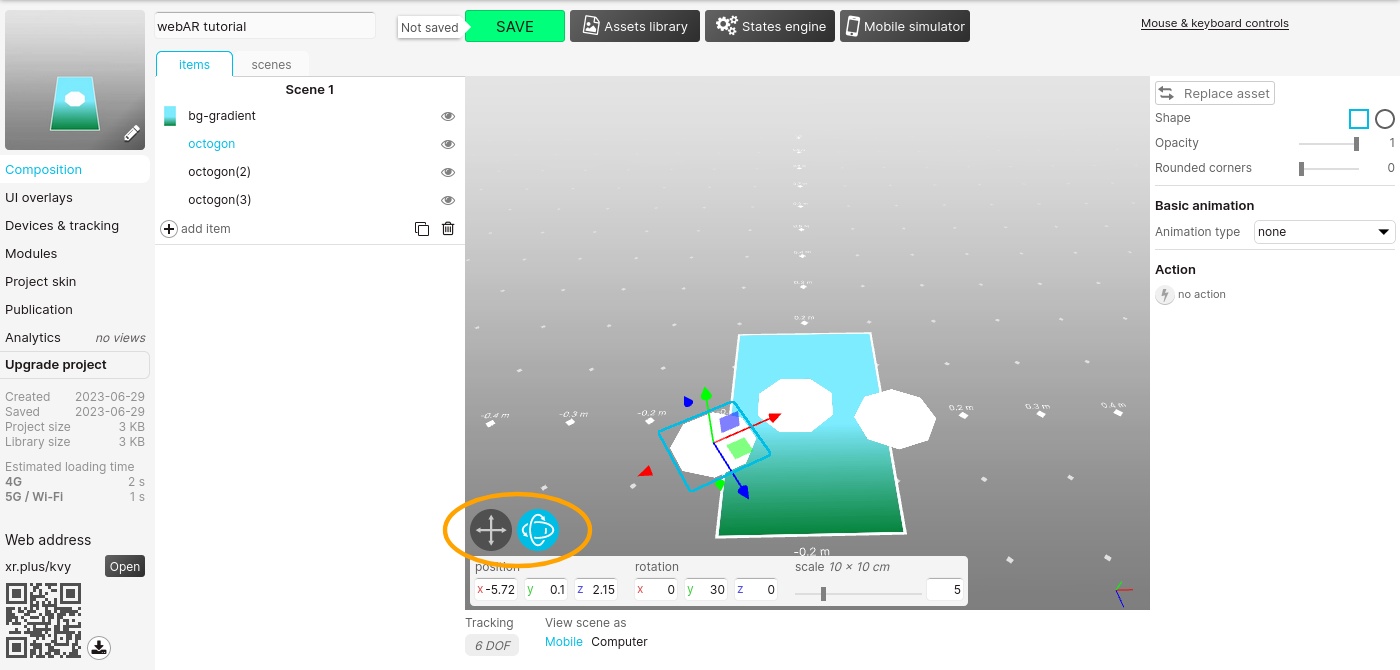
Next, reopen the library and import the ‘octogon.png’ image and add it to the scene.
Scale down a bit the item and place it to a bit on the left. You can use the rotation tool to give it a nice subtle angle.
Open the library to add it one more time to the composition and place it in the center, then add it one last time and place it a bit to the right (you can also duplicate it from left column with the duplicate icon).
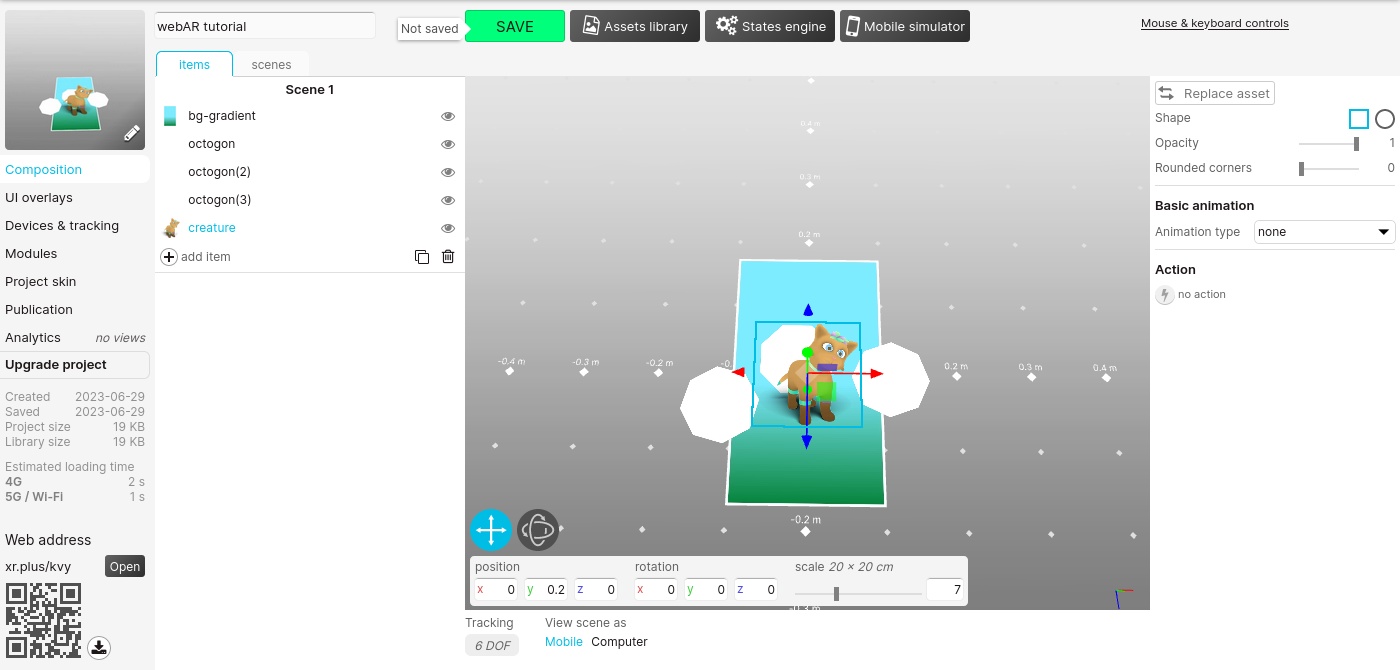
Now import the ‘creature.png’ file, add it to the scene, scale it down a bit, and move it a bit in front and a bit down.
One by one, import the 4 screenshots images and place them at the back of the composition.
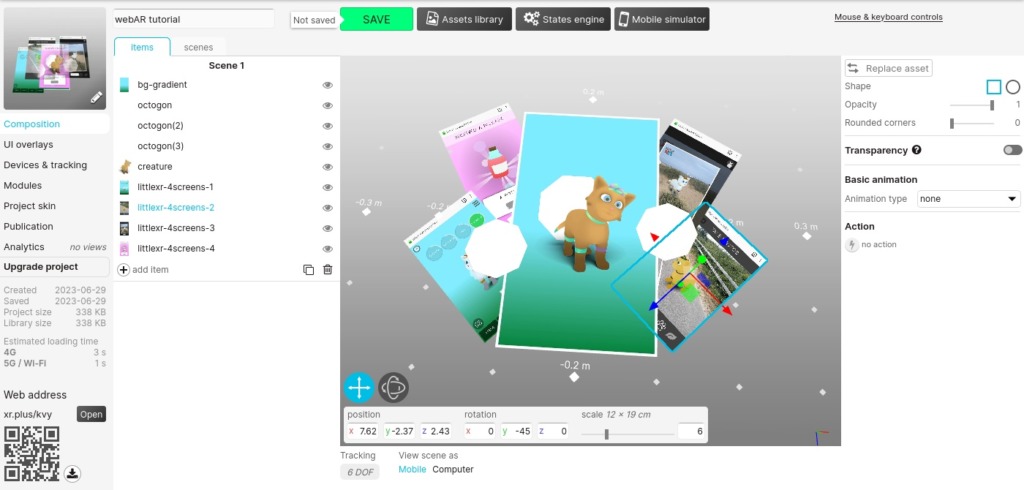
Import the ‘Little XR’ logo and place it on the top left area of the composition.
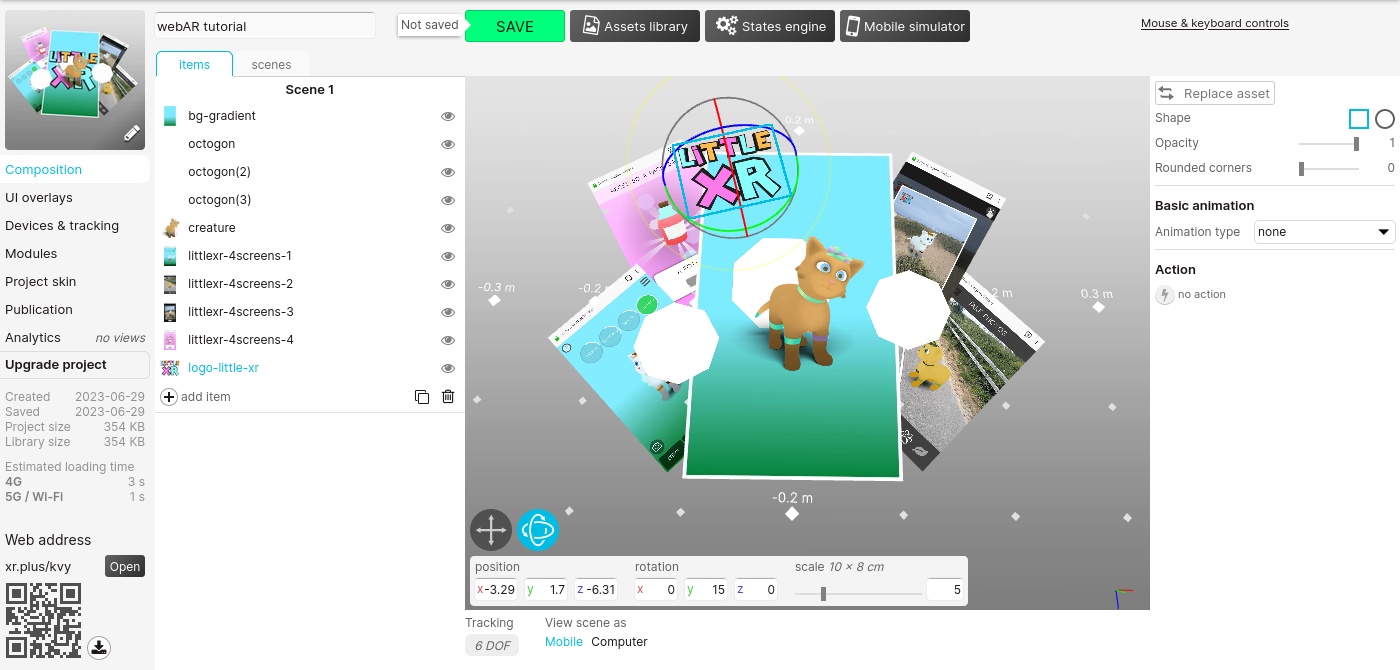
Finally, import the ‘play-now.png’ image, add it to the composition, and set its shape to circle, to make a nice rounded button.
Let’s bring attention to this button by adding a pulse animation. Note that the animation is not visible on the editor, but only when viewing the project on your phone or in the simulator.
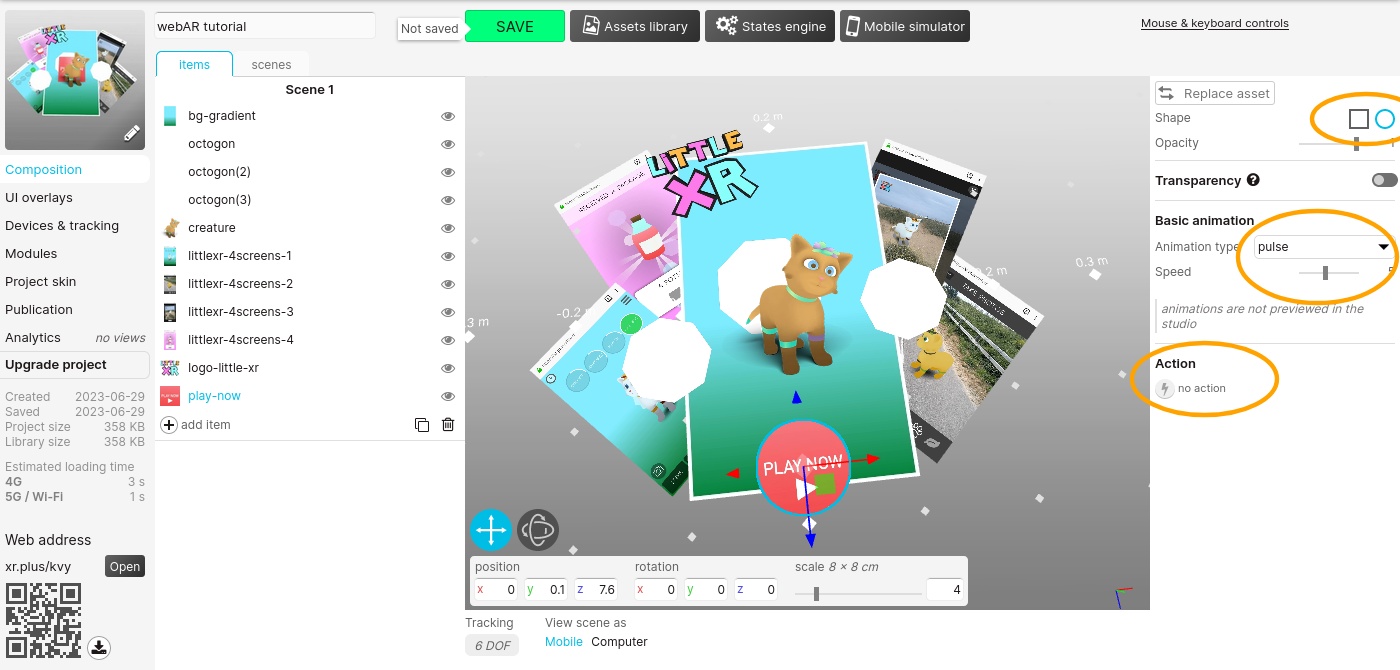
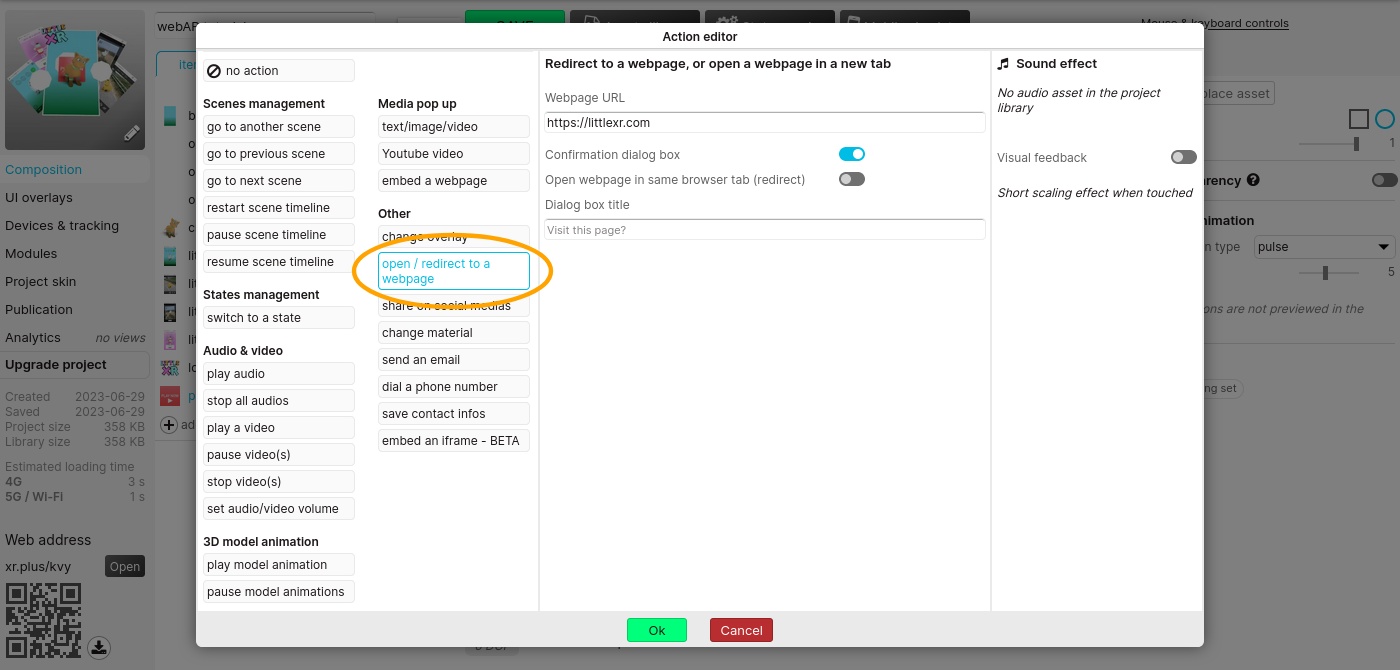
Let’s add an interaction
Click on the action button (with the thunder bolt icon) to open the action editor. Choose ‘open / redirect to a webpage’, set https://littlexr.com as the web address. When users will tap the button, they will be redirected the his website.
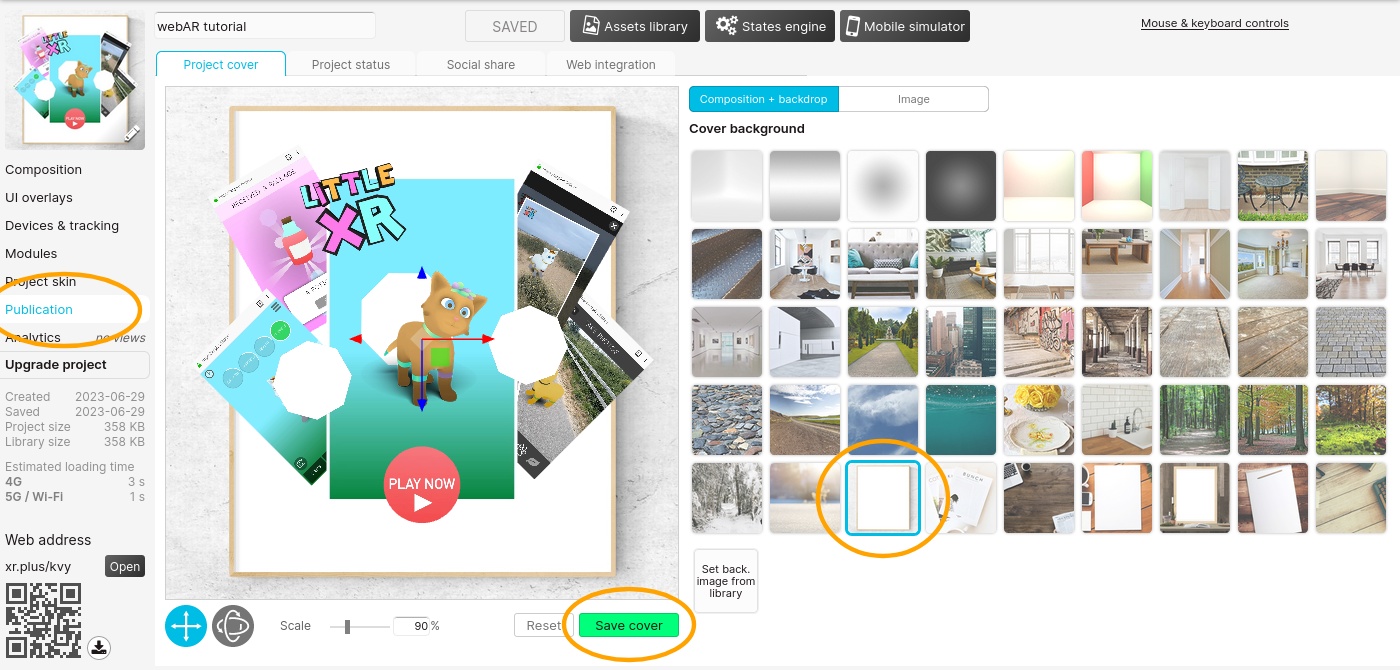
Almost done, now in the ‘publication‘ tab, choose a cover background, press the ‘save cover’ button.
Above the QR code, you can see the public link to you scene, in this case: https://xr.plus/kvy (yours will be different).
Type this web address on your phone web browser or scan the QR code to view the project in web augmented reality.
Voilà!
May 6, 2021
Let’s learn how to add advanced interactions to XR.+ projects using the states engine.
For this tutorial we’ll be using 3 3D primitives: a cube, a sphere and a cylinder.
This tutorial will explain how to create states and buttons to hide and show those 3 objects.
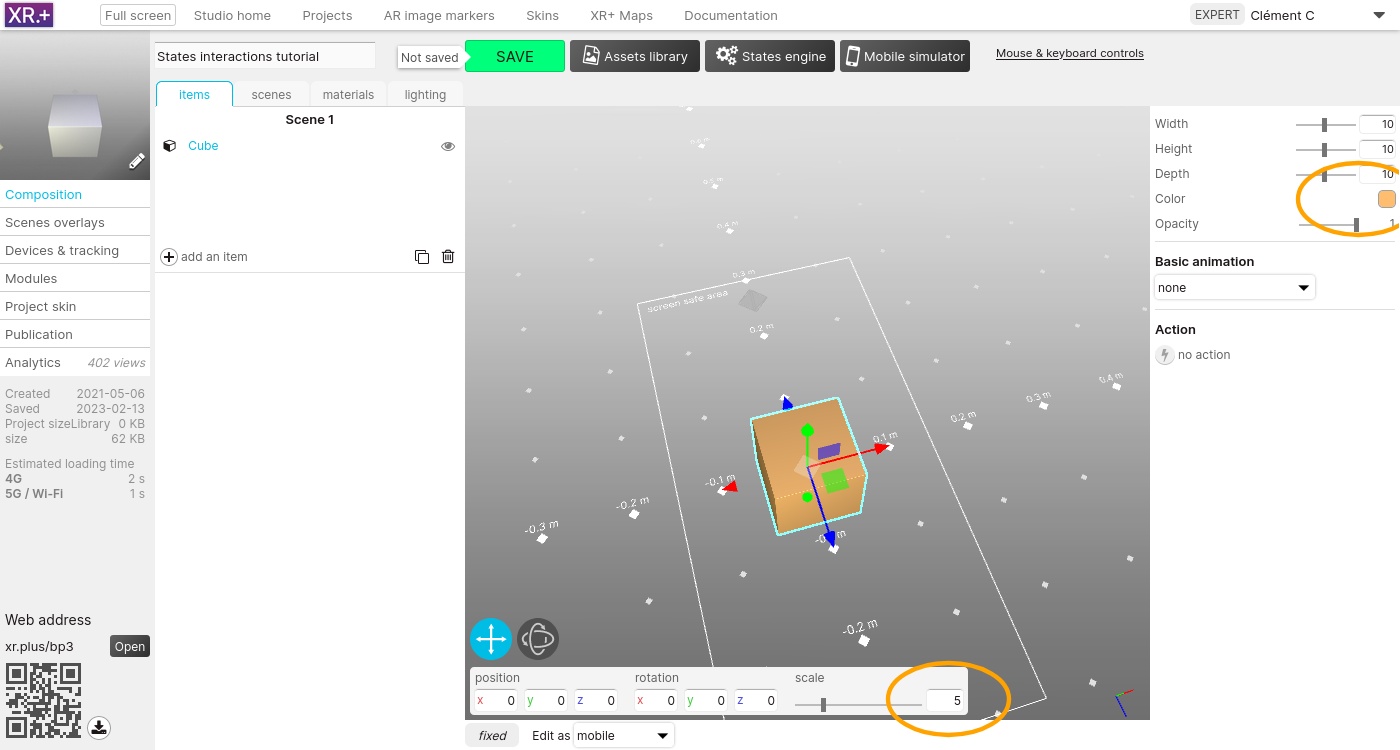
Create a new project in the studio, and add the first primitive: a cube.
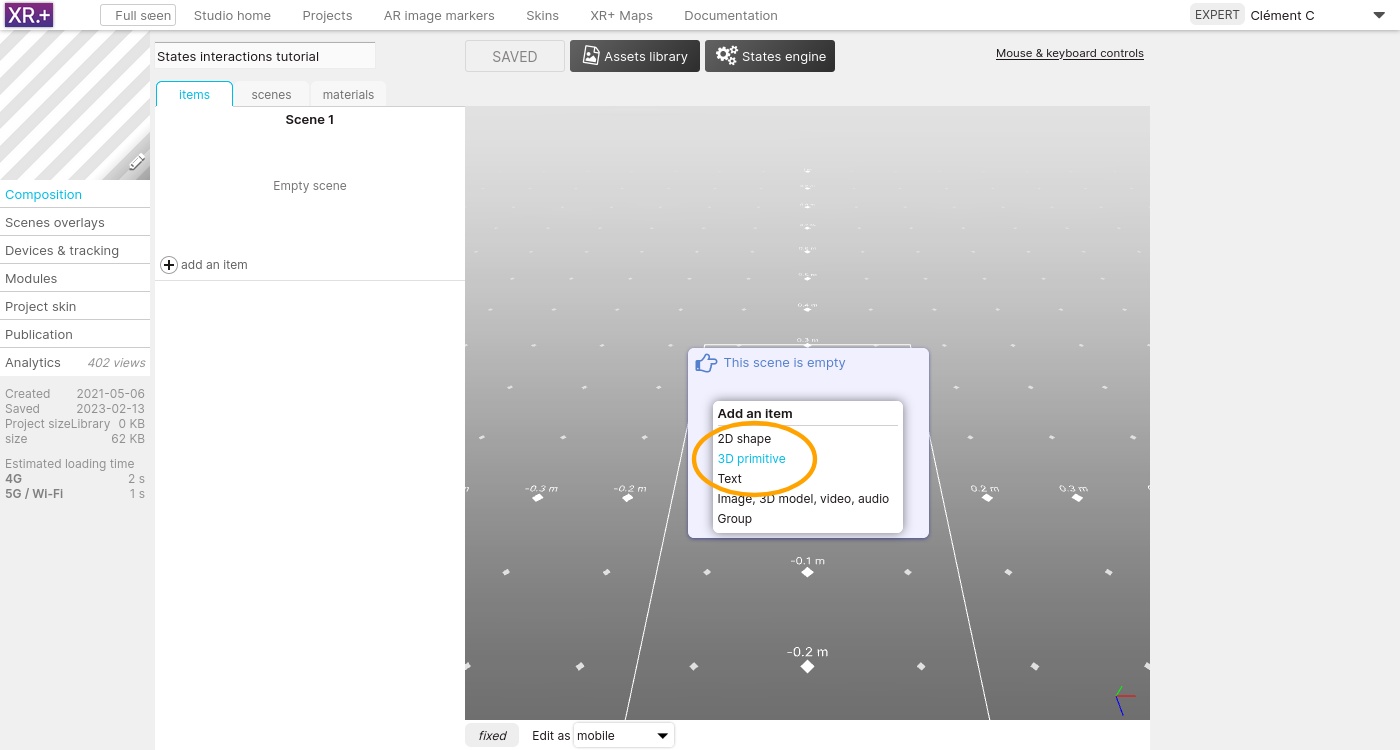
Set its scale to 5 and change its color to orange
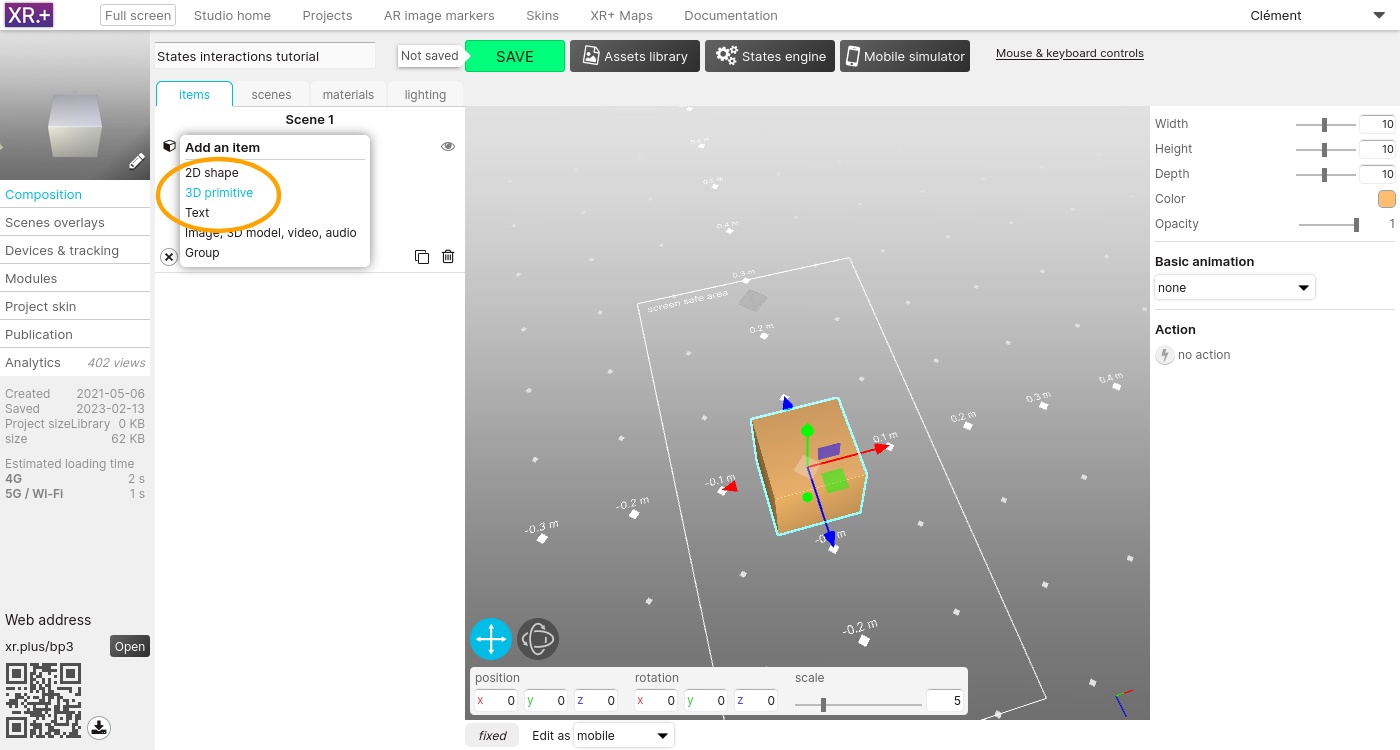
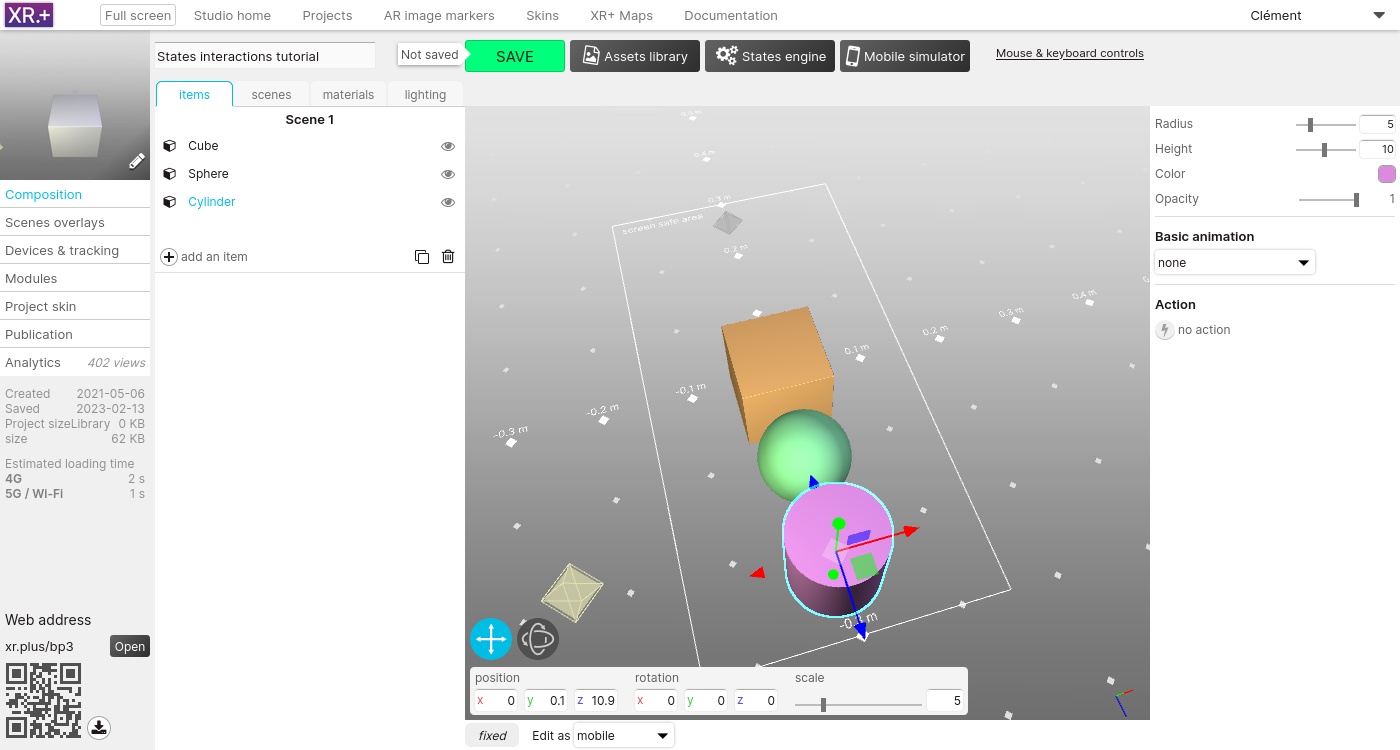
Add a sphere and a cylinder. Set their scale to 5, edit their color, and move them, away from the cube
In the top area, click the ‘States engine’ button to open the states engine, and activate it.

For now there is only one state, the default one. This defaut state is applied as soon as the project is started. States actions are applied when a project switches into the corresponding state.
On this first state, we’ll only show the cube and hide the sphere and the cylinder. To do so, we need 2 actions.
The first action will show the cube, the second one will hide the 2 other items.
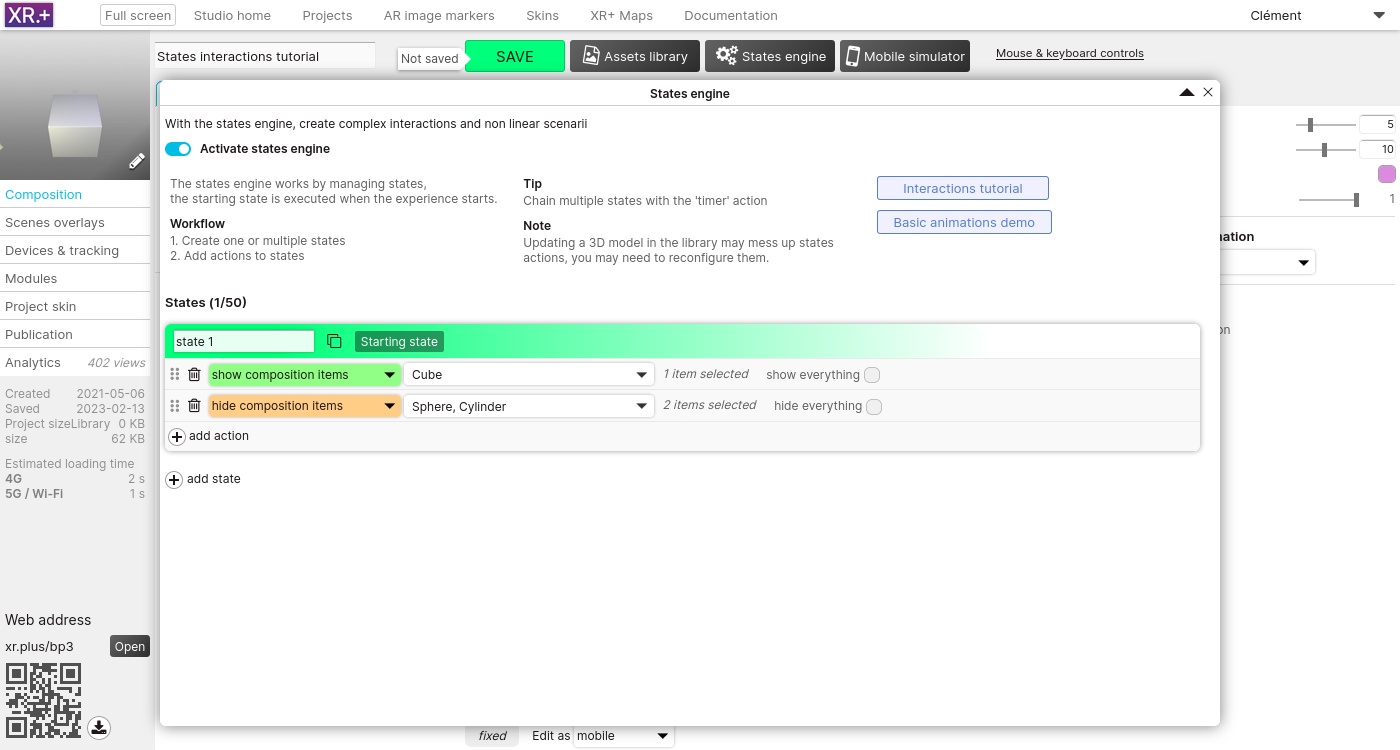
Let’s create another state, this new state will only show the sphere. Again, we need 2 actions: one to show, another one to hide. Finally, the third state will show only the cylinder.
The 3 states now look like this, each with 2 actions:

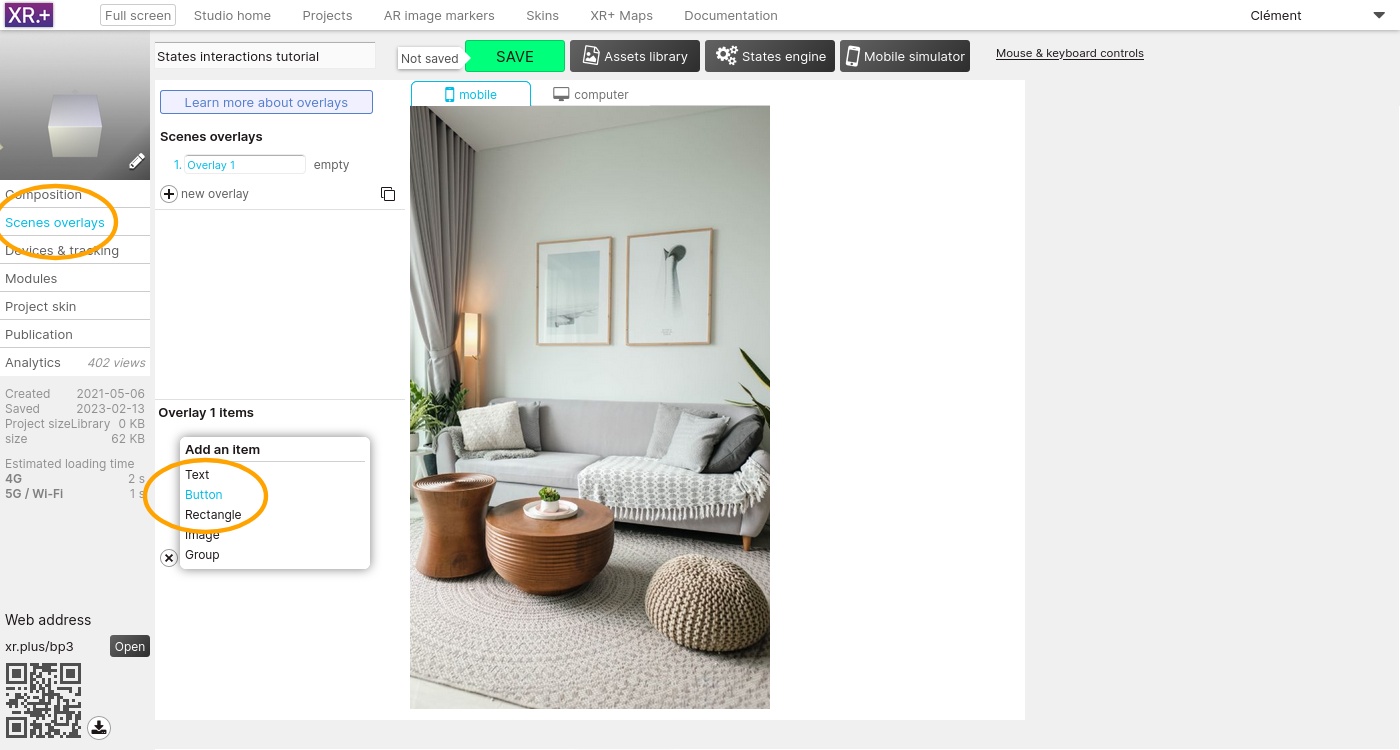
Now that we have created our 3 states add added action to each of them, we will use overlays buttons to switch between them.
Go the ‘Scene overlays’ and add a first button to switch to the state 1.
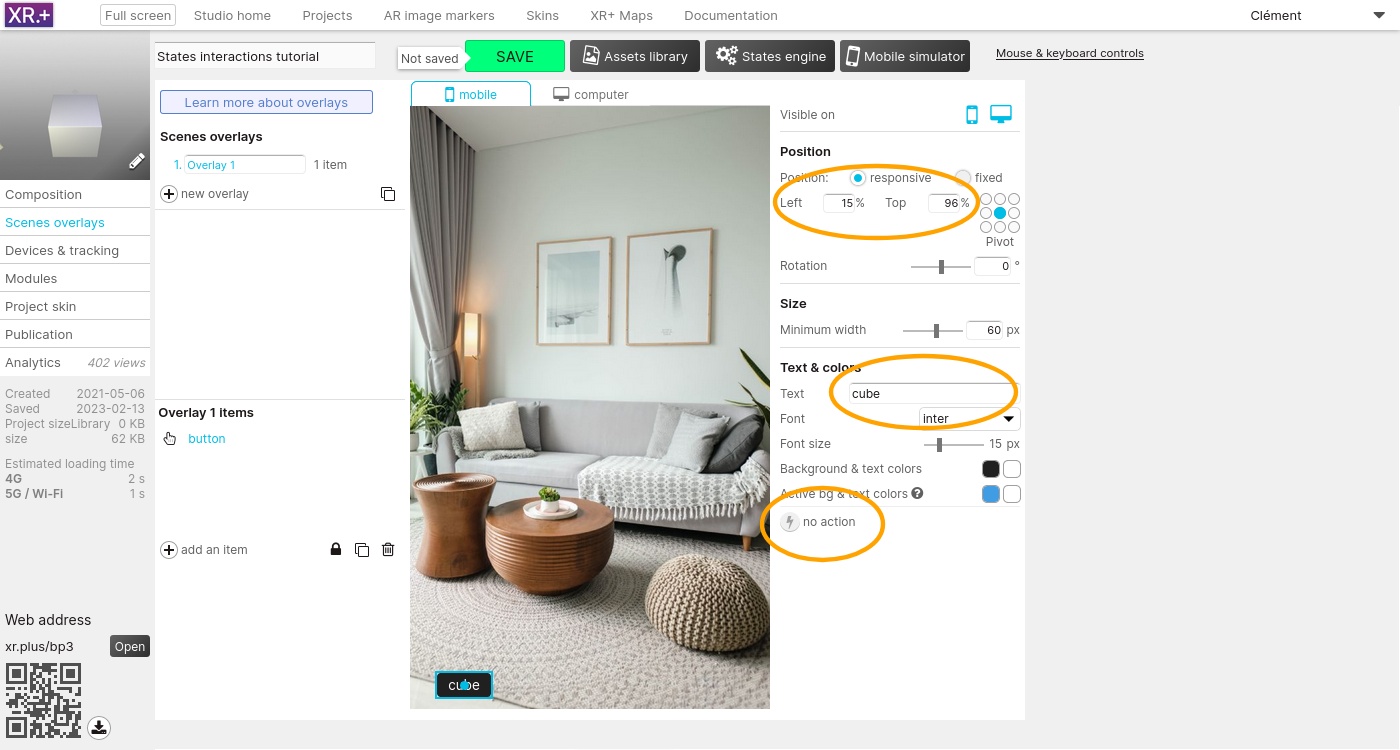
Edit its position, text, and assign it an action
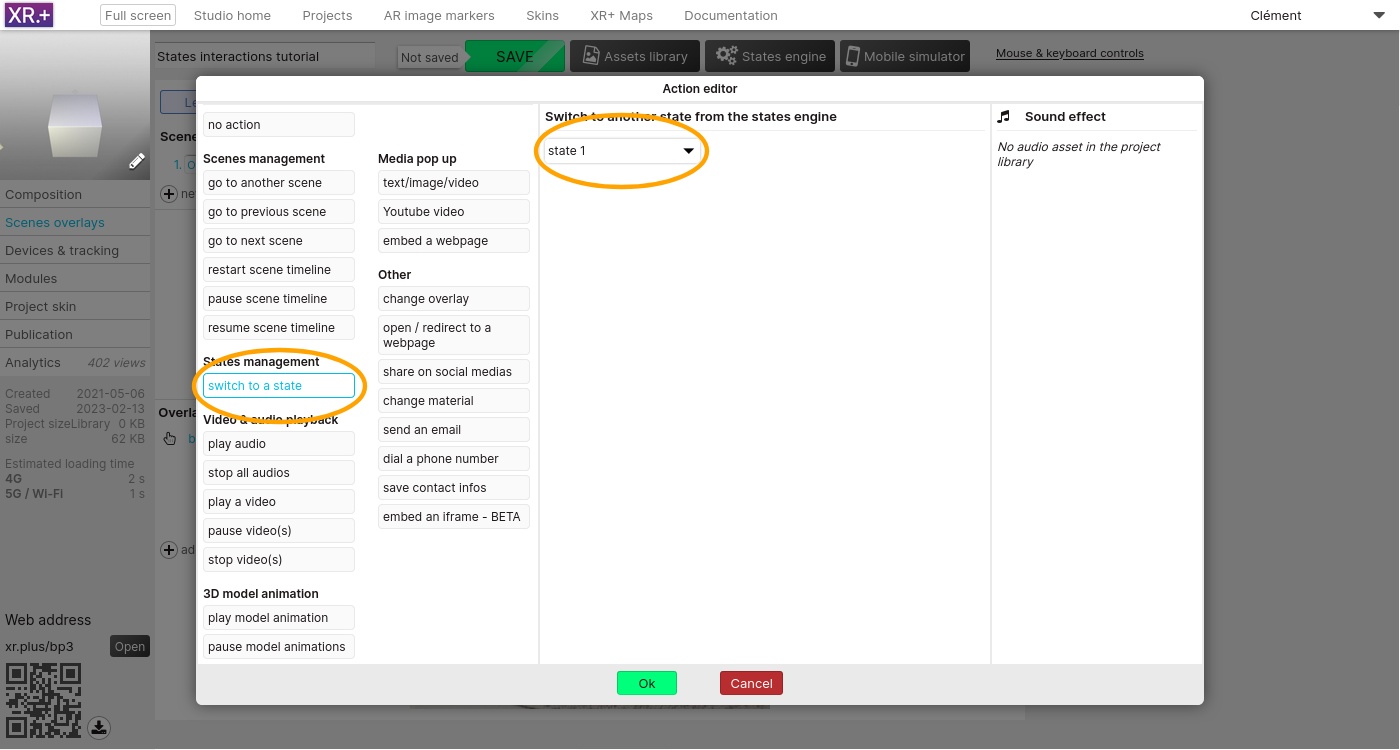
We need 3 buttons: one for each state. The second button will switch to state 2, and the third button will switch to state 3.
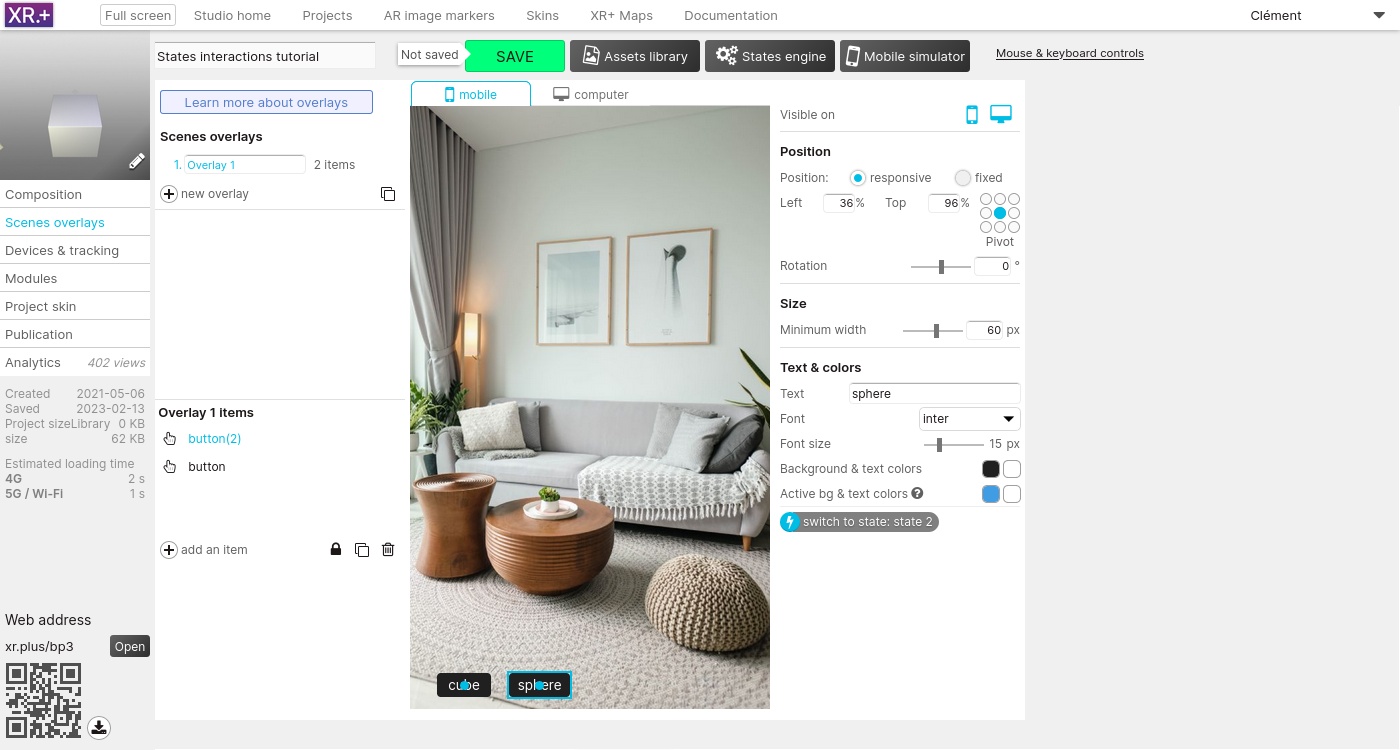

You can now test your project in the mobile simulator, in your computer web browser or in your phone browser by scanning the QR code.
Or you can test directly this tutorial project: https://xr.plus/bp3
January 19, 2024
The following steps describe how to manage XR+ users groups available on the education licenses.
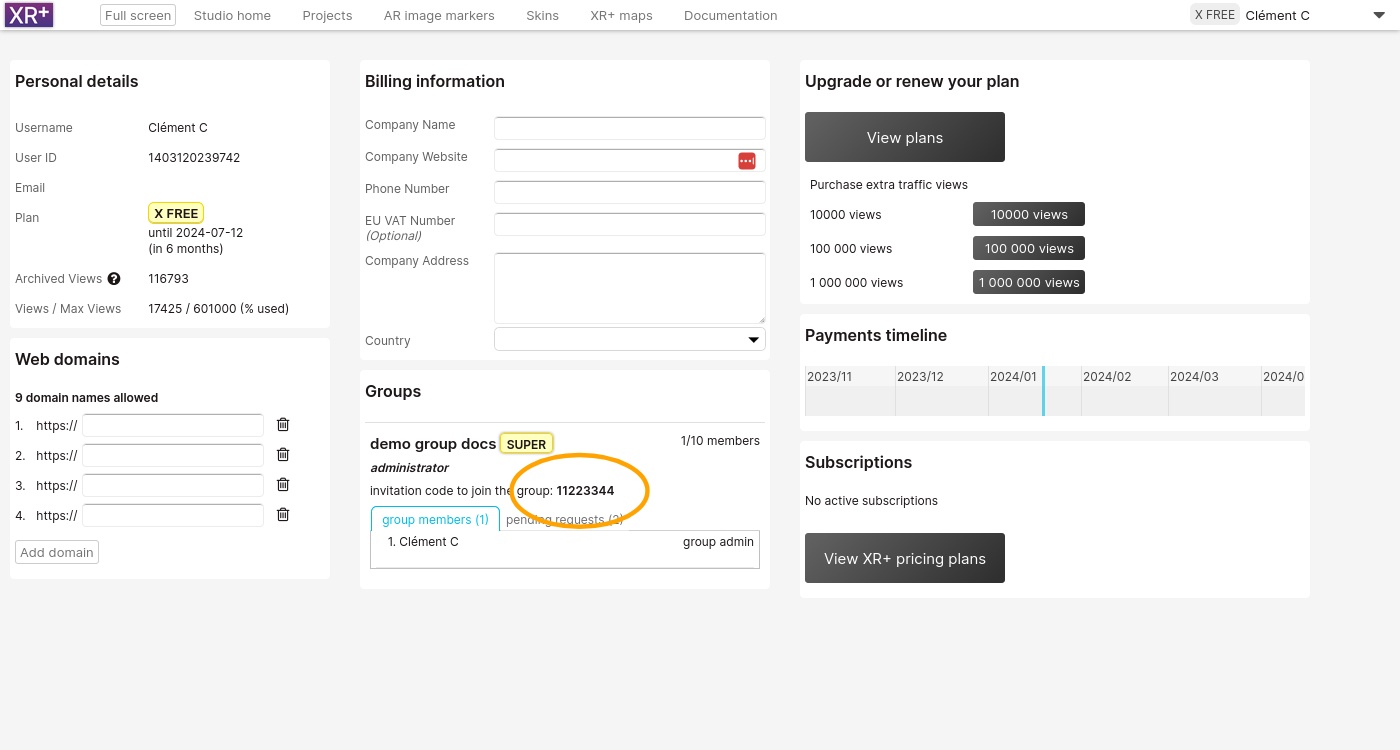
Once your group has been setup, go to your XR+ studio profile.
If you are the group administrator, an invitation code will be displayed. Share this code with your students so they can request to join the group.
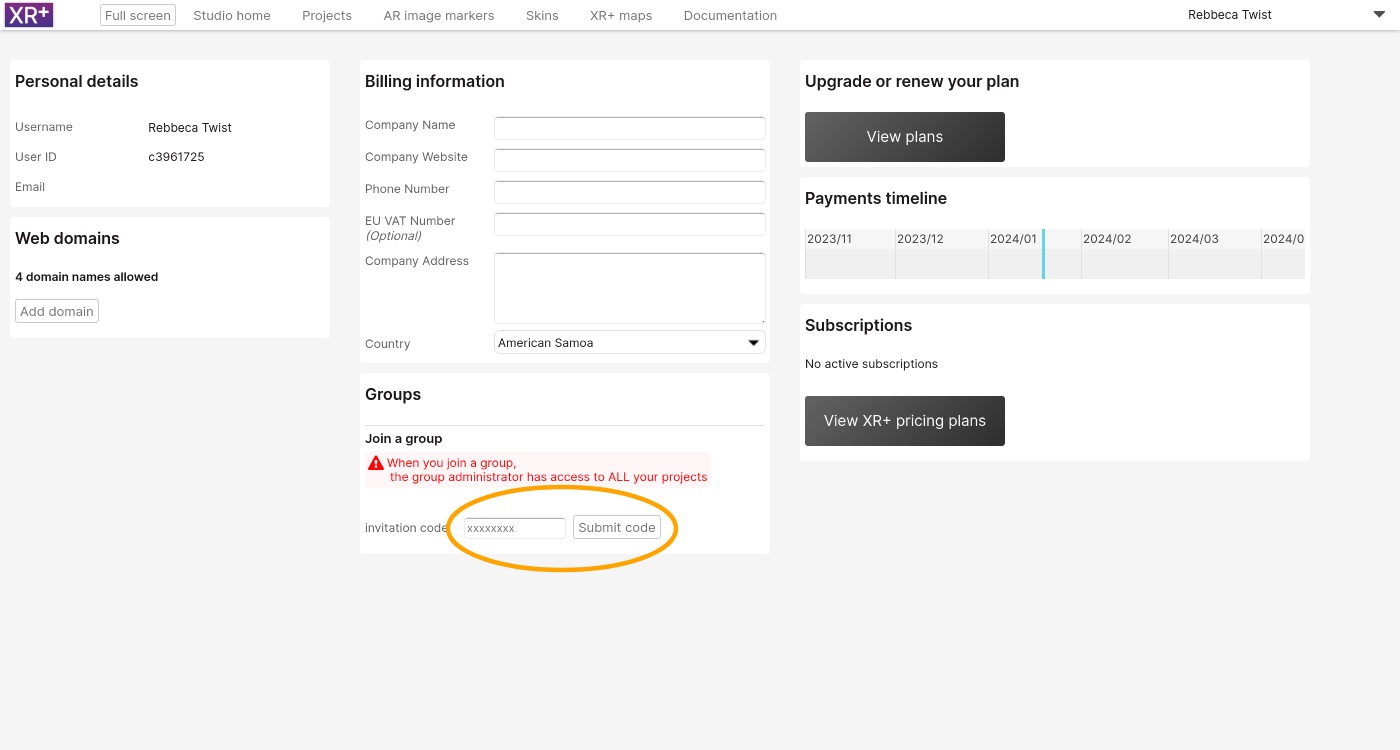
With this code, your students can request to join the group. This is done in the student XR+ studio profile area
The group administrator can now accept or reject the request
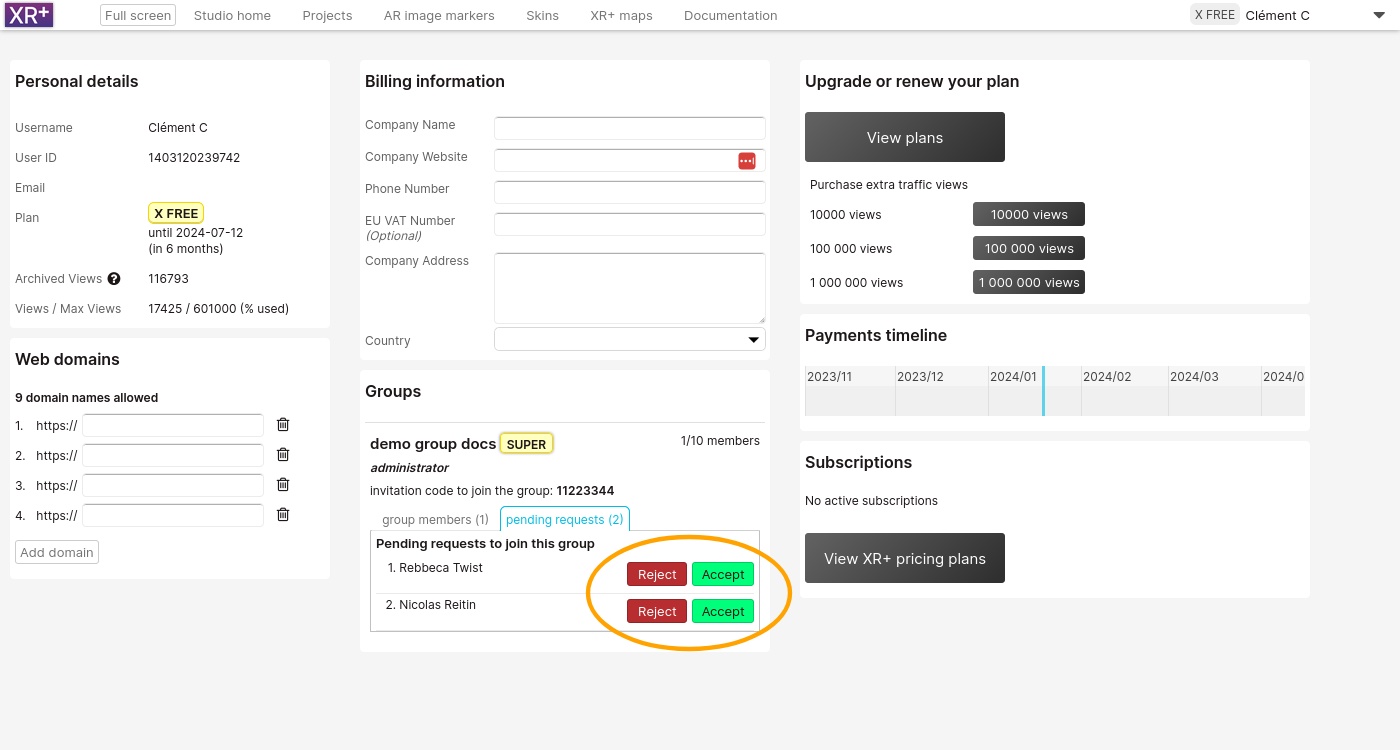
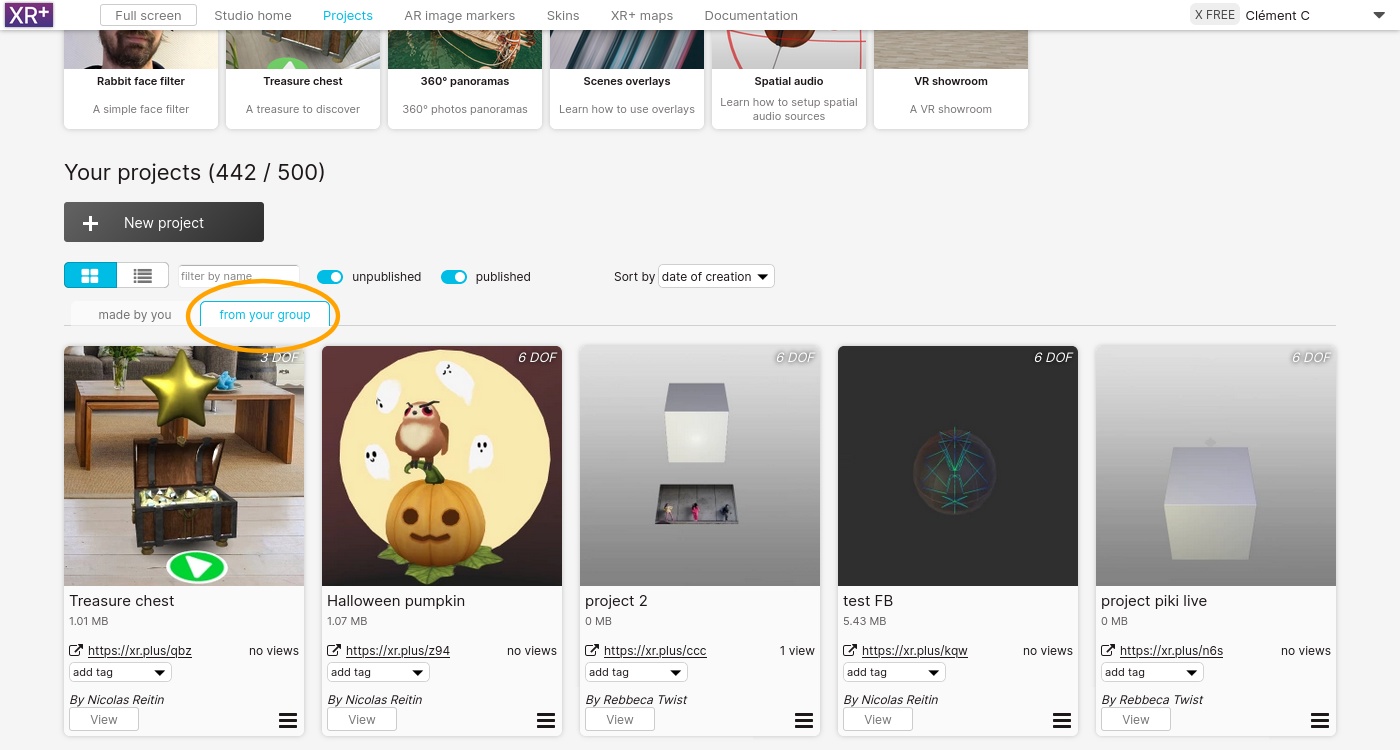
The group administrator has access ( as read only ) to all the group members projects. They are displayed the in the ‘from your group‘ tab, in the projects area
To learn more about XR+ education licenses, contact us