Here’s a simple tutorial on how to publish a 3D model in augmented reality on the web ( aka webAR ).
Let’s go through the various steps on the xr.plus platform…
If you don’t have yet an xr.plus account, create one ( the basic plan is free )
Click here to create a free account
Create a new project and import a 3D model from your hard drive. Supported formats are .obj, .fbx and .glb (gltf).
For this tutorial, I’m using a Bonsai tree available here (download the fbx version).
This model was made by Scopia Visual Interfaces Systems, s.l. and Eteks,
available under the Creative Commons license ( https://resources.blogscopia.com/license-2/ ).
Is it also possible to make a project only from images, but I’ll only cover the 3D model process in this tutorial.
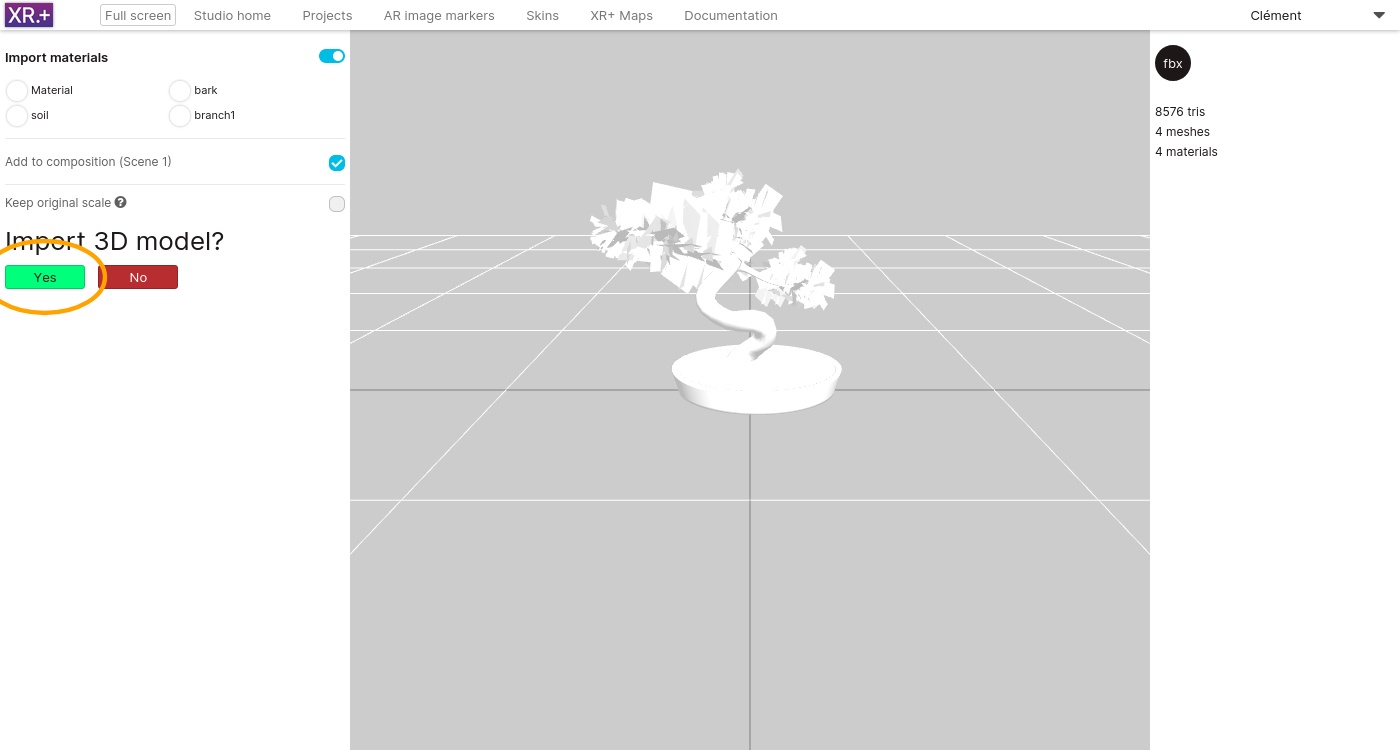
If the imported model includes materials, you will be asked if you wish to import them.
For this model I’m choosing ‘yes’, so materials will be automatically assigned to the meshes.
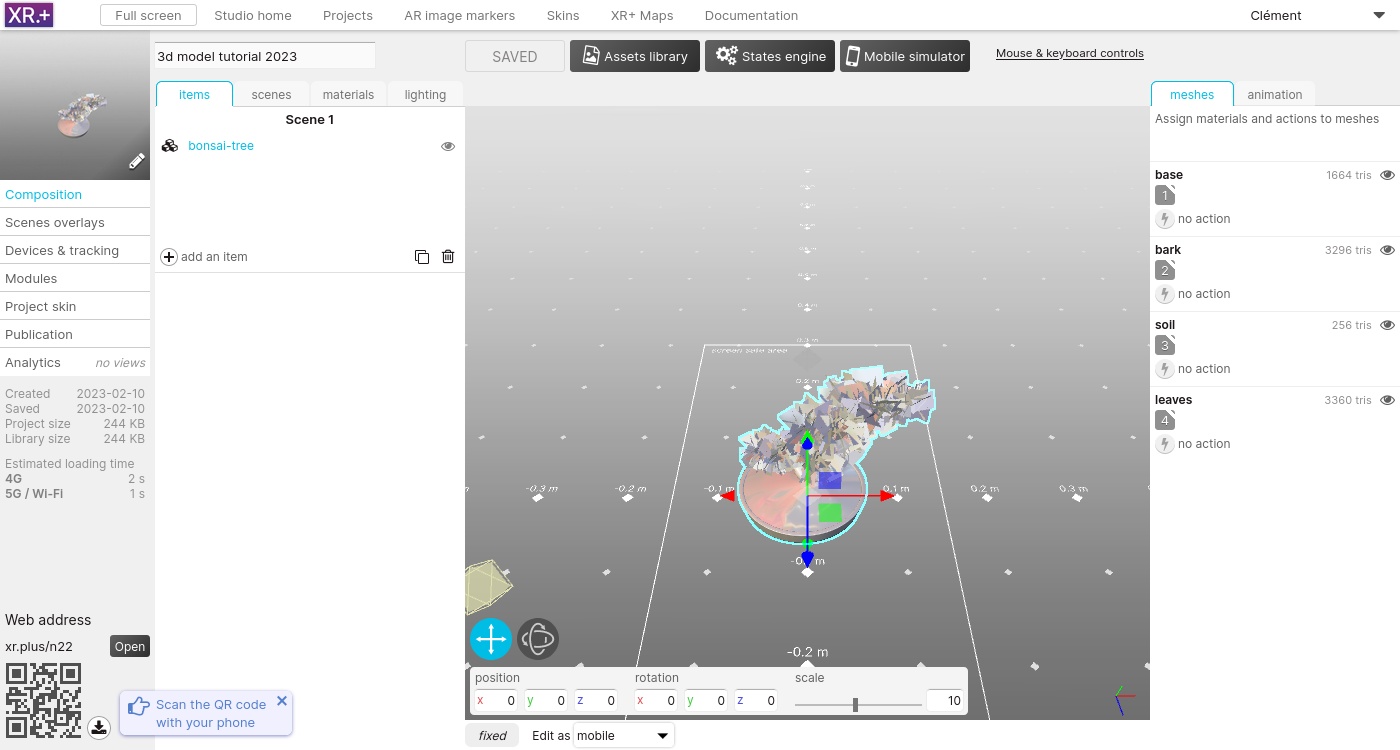
This is the 3D composition view:
– on the left column you can see the list of all items dropped in the composition (here there is only the bonsai tree)
– on the left column you can also switch to scenes, materials and lights listing.
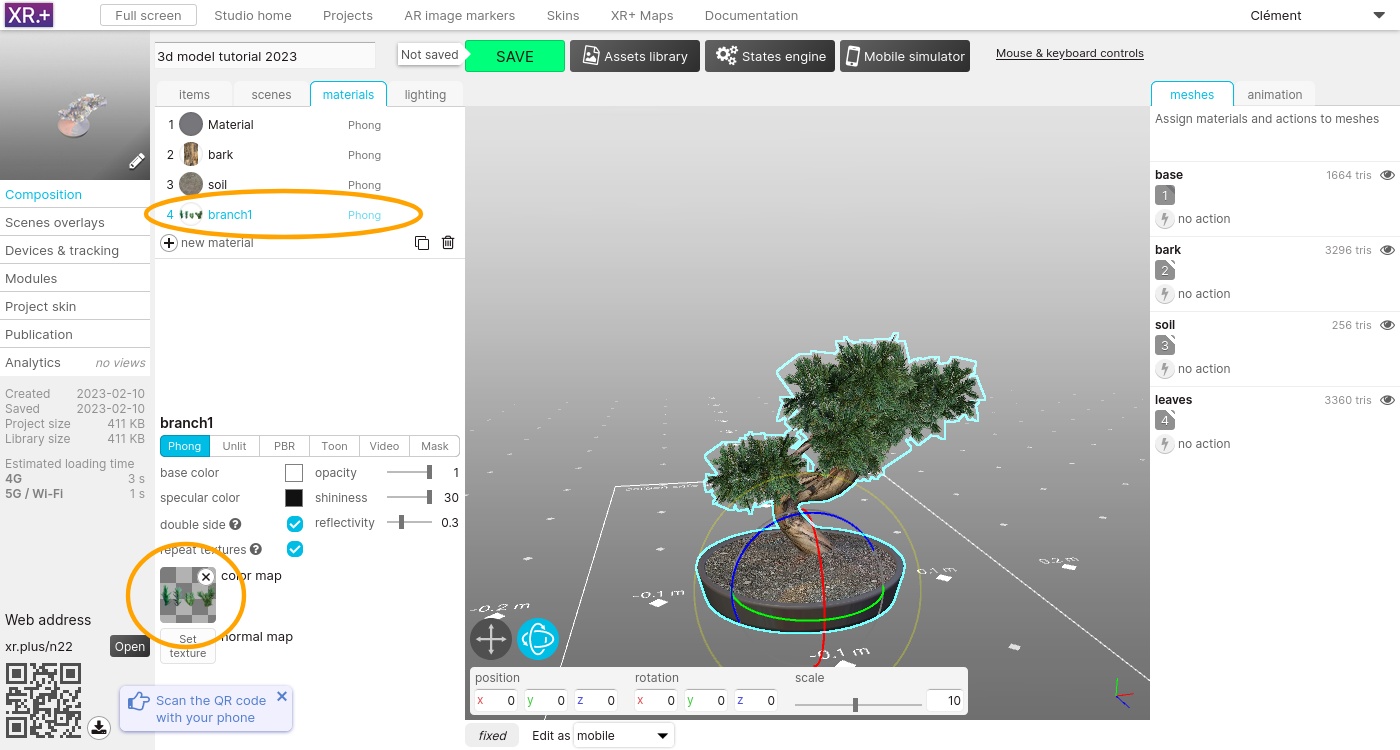
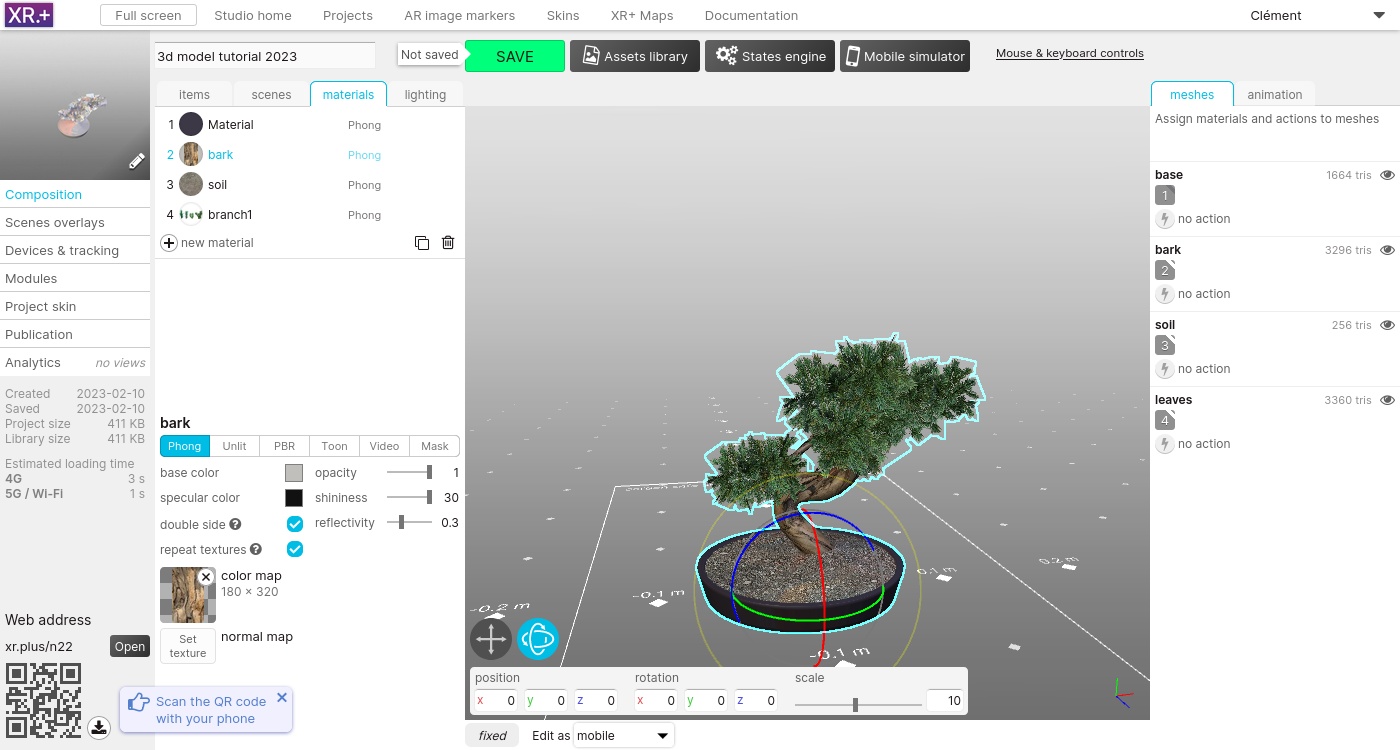
– the right hand side column displays the list of meshes from the model. This is where you can assign materials to model meshes
The top material is used on the tree pot, I’m choosing a dark gray for its color
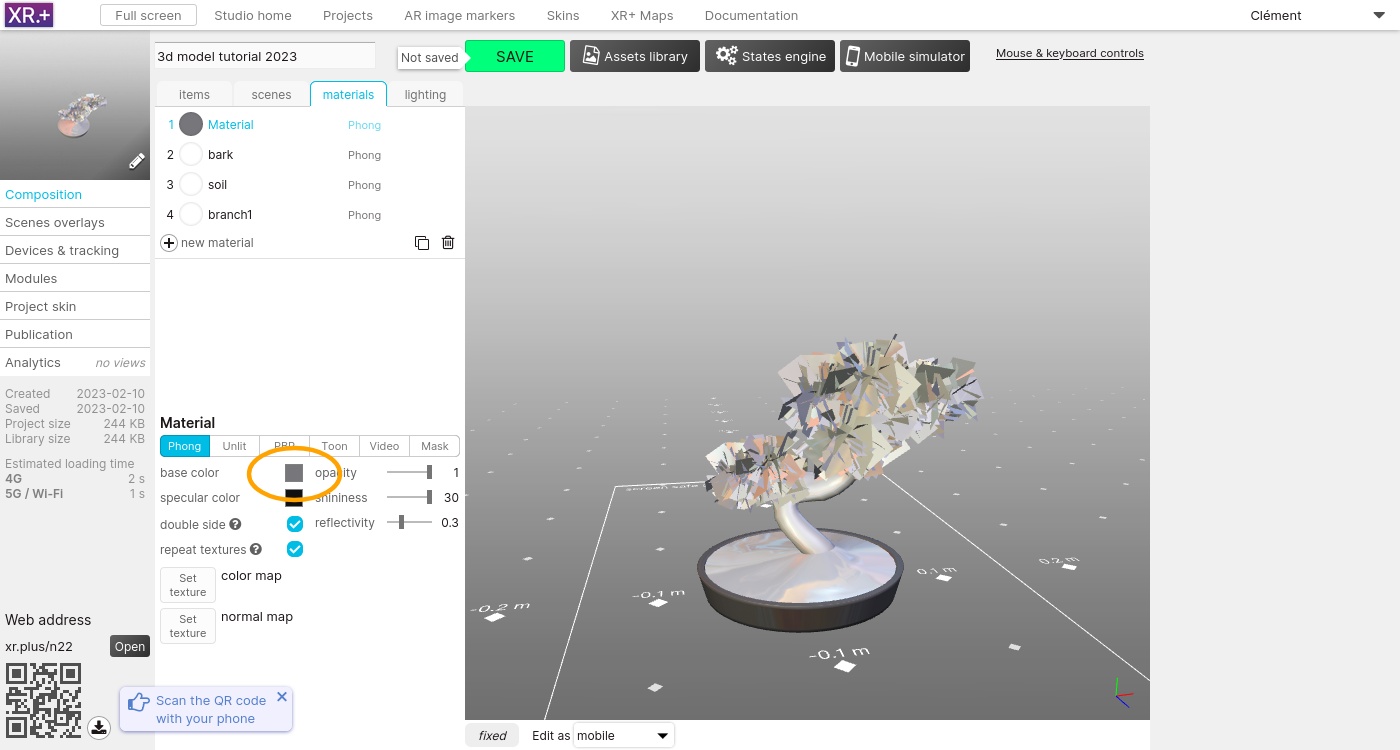
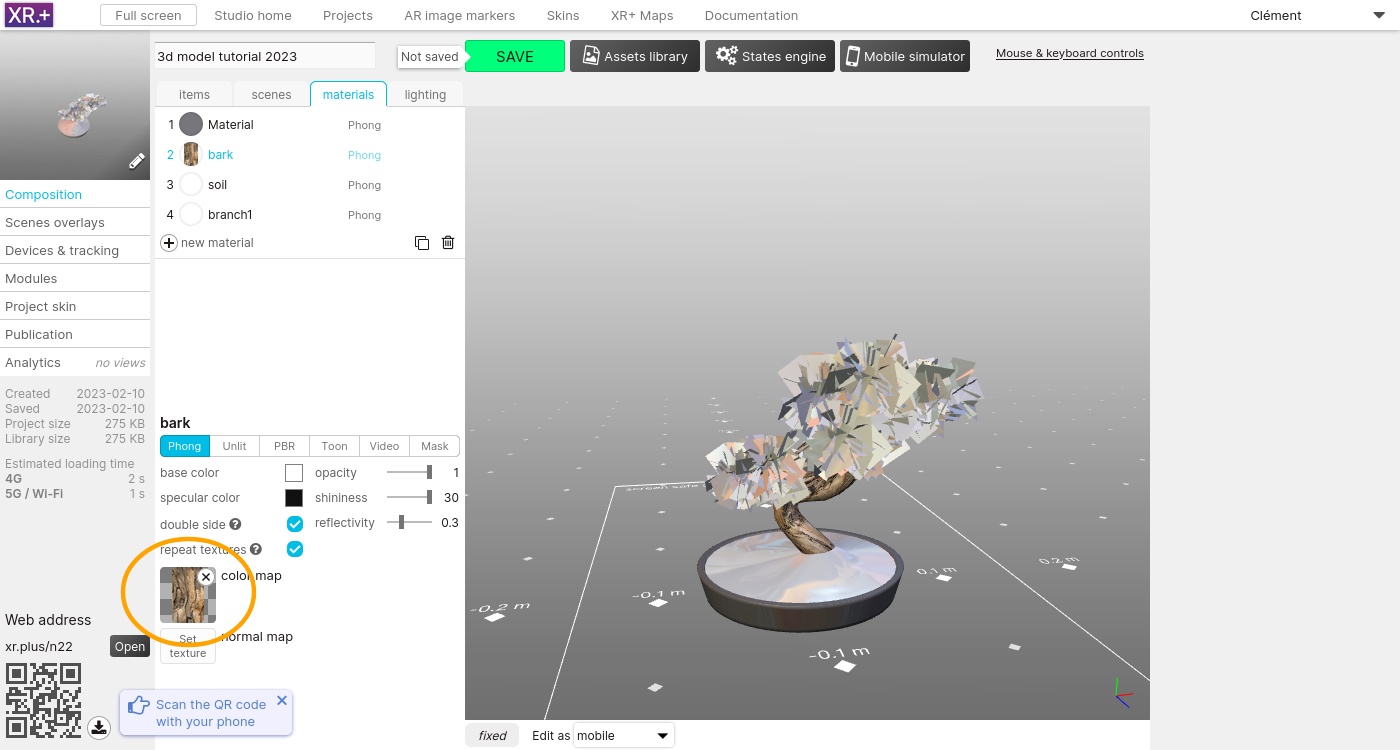
Adding the texture for the trunk (included with the model zip file), on the ‘bark’ material
Adding textures for the soil and leaves.
Some extra material adjustments to darken a bit more the pot and the trunk (changing the default white color of a material to a darker color will also affect the texture), and lowering the shininess of the trunk.
Finally, set the tracking mode to 6DOF SLAM

Your project is now ready and already published!
On the left column, you can see the public link to your project, in this case: https://xr.plus/2m5
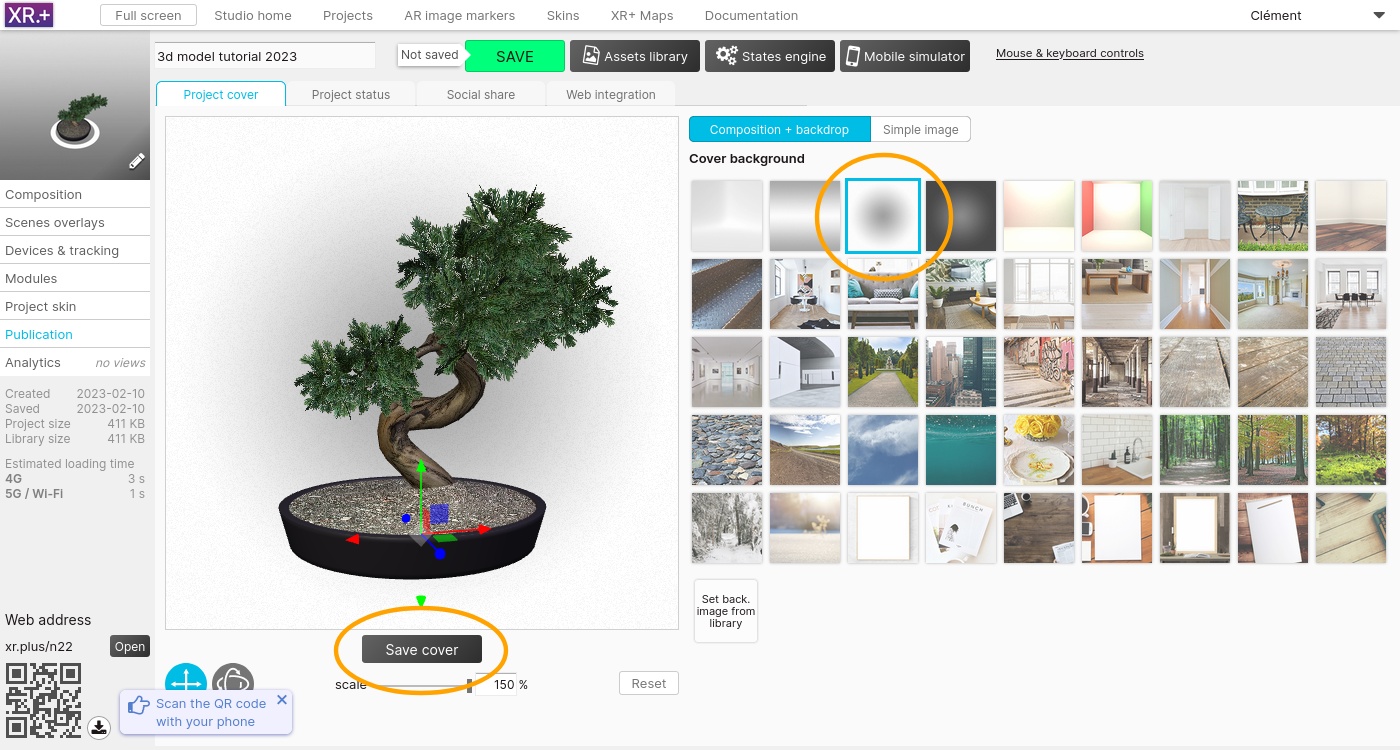
You can customize the project cover image, to do so, go to ‘Publication’ > ‘Project cover’.
You can select an image for the cover background and adjust the position and size of the Bonzai tree.
You can import an image from your hard drive to be used as a cover.
Click ‘save cover’ to update the project cover.